Automate repeated steps with recipes
Some jobs are the same every time. Merge two drawn layers into a single mask layer, bias it by a fixed amount, write the mask file — then do it again next week on the next design, in the same order, with the same numbers. Doing that by hand is not hard, it is just easy to get subtly wrong, and nobody notices until the mask is written.
A recipe is Glyph's answer: a named, ordered list of editor commands you can save, re-run, and read. It is deliberately not a scripting language. A recipe file is plain JSON — a name and a list of action ids, each with optional parameters — and nothing in it is ever executed as code: there is no eval, no Function, and no dynamic import of an imported file anywhere in the recipe module. A step names a command you could have picked from a menu, and that is the whole vocabulary.
This guide builds a three-step recipe, runs it, undoes it, changes the drawing, runs it again, and then breaks it on purpose to show exactly how a bad recipe fails.
- Time: ~15 min
- You'll need: Glyph open on a blank document, and — for step 11 — a plain-text editor (Notepad, VS Code, TextEdit, anything that isn't a GDS-aware tool). Nothing to fetch beforehand: the one outside file this guide touches is a recipe it exports itself, and it lands wherever your browser saves downloads (its Downloads folder, unless you've told it otherwise).
One orientation note: the tabbed Layers / Cells / Objects / Results panel sits on the right-hand side of the window, under Properties.
Draw something worth automating. Click the Layer 1 row in the Layers panel to make it active, arm the Box tool (the square icon in the toolbar, shortcut
B), and drag a rough box near the origin. With it still selected, size it exactly in the Properties panel, pressingEnterafter each:W 60,H 30, thenX -60,Y -15(µm). W and H resize the shape about the point the Anchor chips (Corner / Center, at the top of the Properties panel) light, so that point stays put: on Corner the lower-left corner holds, on Center the centre does. Either way, the order you type W, H, X and Y in doesn't matter. Click the Layer 2 row, arm Box again — re-arming is required every time, because Glyph's draw tools are one-shot and drop back to Select after every shape — and drag a second rough box, sized toW 40,H 80,X -20,Y -40. The two deliberately overlap: layer 1's box spans −60 to 0 µm on X, layer 2's spans −20 to 20 µm, so they share a 20×30 µm strip in the middle — that shared area is exactly what the recipe's union step merges in step 6. You now have one shape on1/0and one on2/0. The status bar reads2 shapes.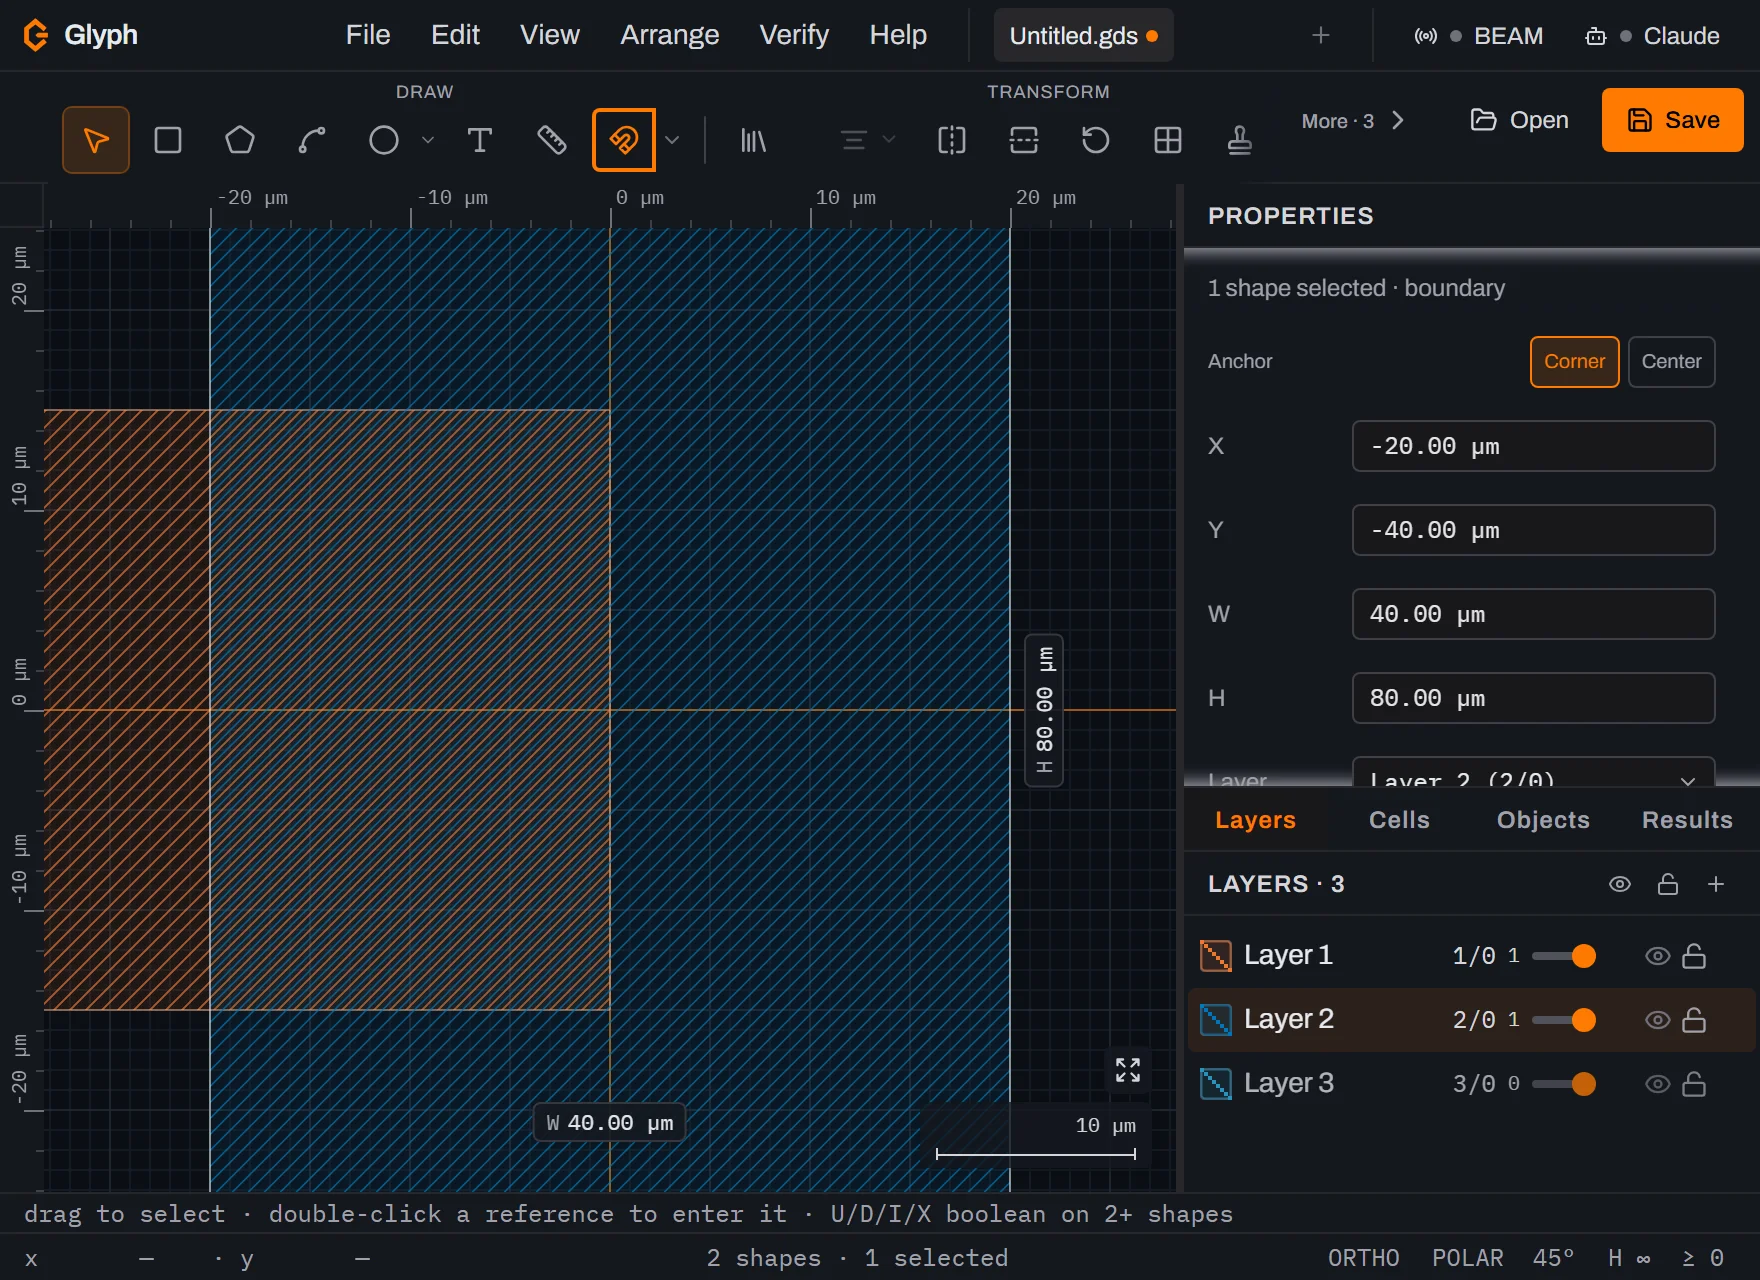 View full image
Open Edit → Recipes…. The dialog starts with no steps: a Name field pre-filled with
My recipe(you'll replace that text in the next step), an empty step list, an action picker, and Import… / Export… buttons. The grey note at the bottom is the contract in three lines — plain JSON, never executed as code, steps run one at a time and stop at the first failure, and a recipe is not one undo entry.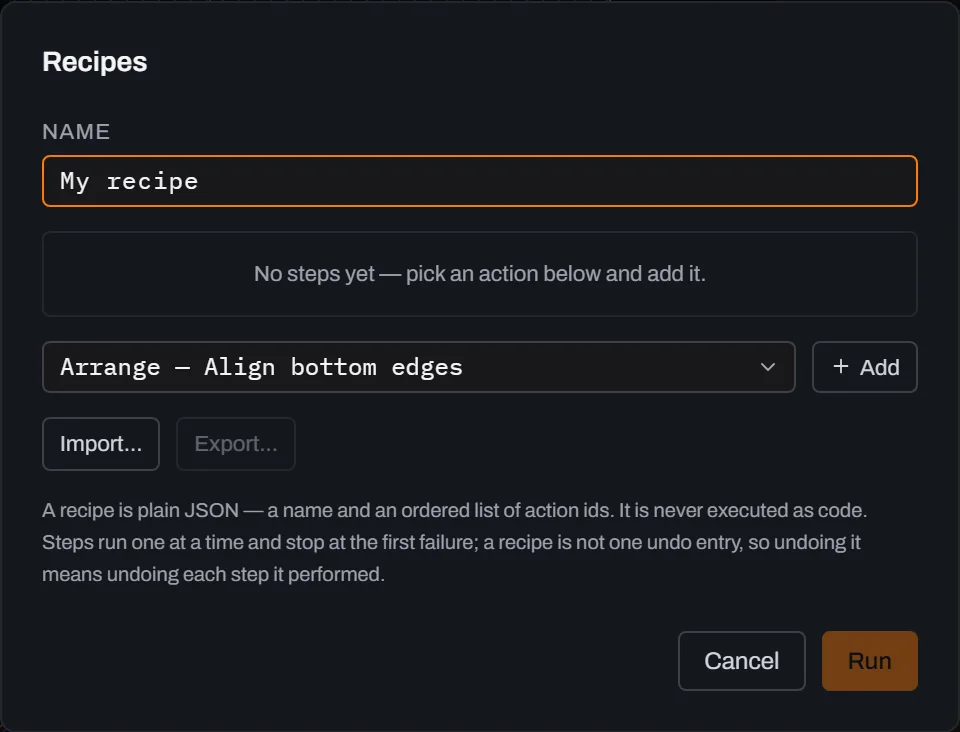 View full image
Add the first step. Replace the Name field's
My recipewithMerge and bias. Then pick Arrange — Layer operations… in the action picker — careful: the picker opens on Arrange — Array…, a different command one entry away — and click + Add. The step appears with a grid of parameter fields — and that grid is rarer than it looks: of every command in Glyph, exactly two accept parameters today, and . Add any other action and the step is just a name. Note what the step says while the fields are blank: "Leave blank to open this action's dialog when the recipe runs." That is the default, not an error.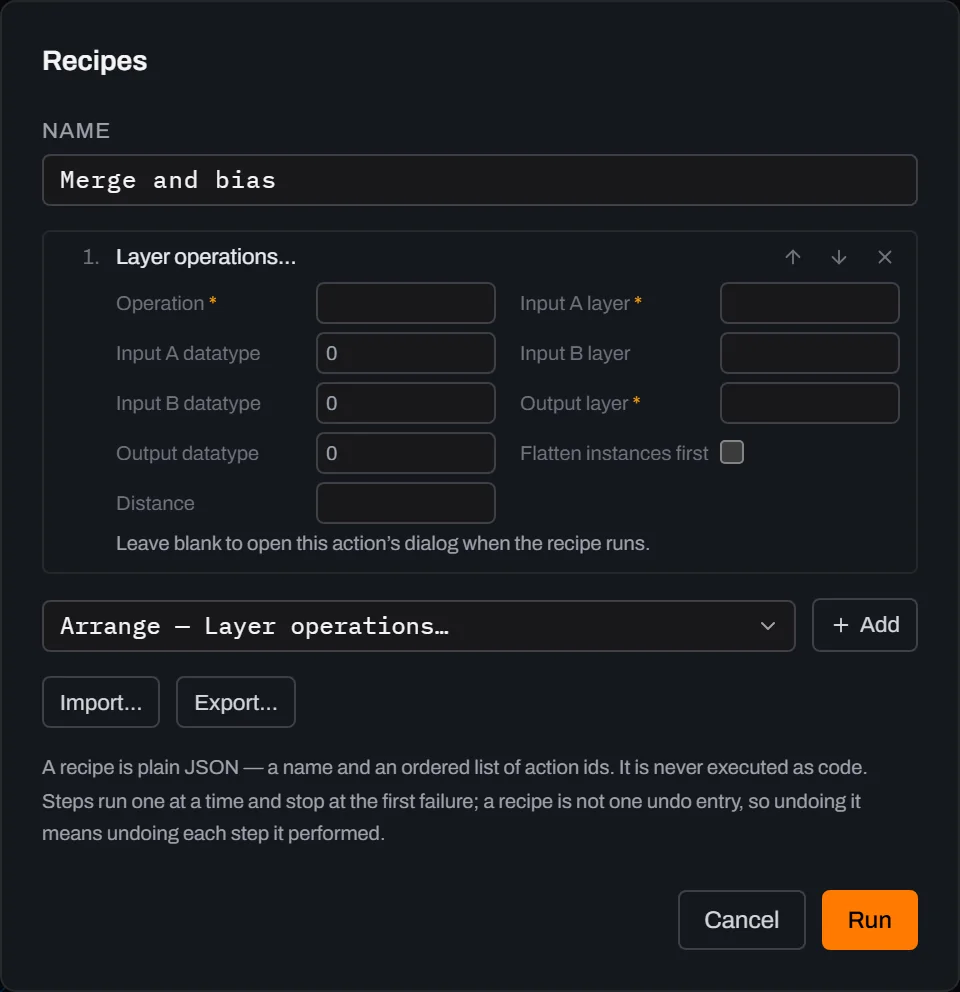 View full image
Fill the step in, and it stops asking. Type
unioninto Operation — it's a free-text field, not a dropdown, but hover it and the tooltip spells out the whole legal set: "One of: union, diff, intersect, xor, grow, shrink." Anything else is refused the moment the recipe runs (step 12 shows that refusal for a different field). Then1into Input A layer,2into Input B layer and10into Output layer. The greyed0s in the datatype fields are placeholders showing the default, not values you have to type. The note under the step now reads "Runs without opening the dialog." — that flip is the whole parameter channel: a step that supplies parameters runs headless, a step that supplies none opens its dialog exactly as it always did. So a recipe you saved before this feature existed still behaves identically.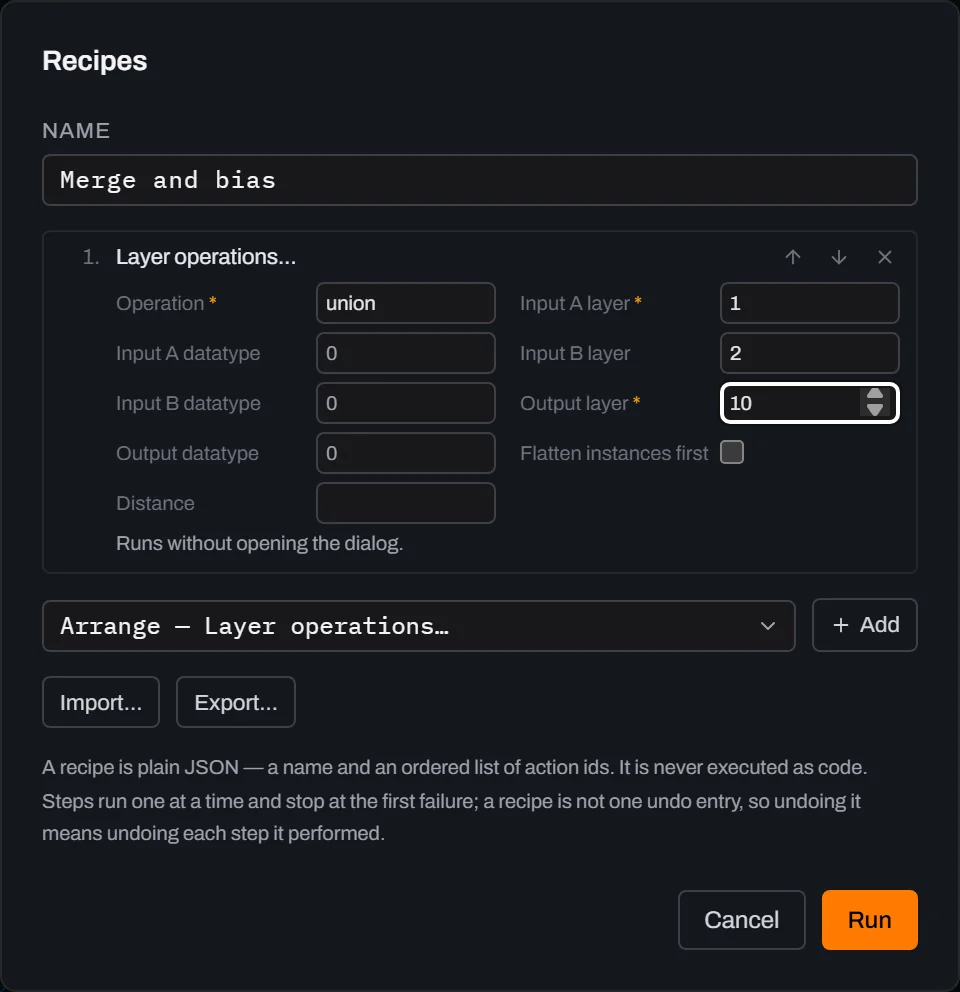 View full image
Add the other two steps. Add a second Layer operations… step and set Operation
grow, Input A layer10, Output layer11, Distance3000— the Distance field shows a bare number with no unit beside it, and it is in nanometres, so3000is a 3 µm bias; this is the one field in these guides where typing the µm value would be a 1000× error. (growandshrinkare unary: they never read Input B.) Then add File — Export per layer… and set its Layer number to10. The step list is a short scroll box, so with three parameterised steps you scroll to see them all.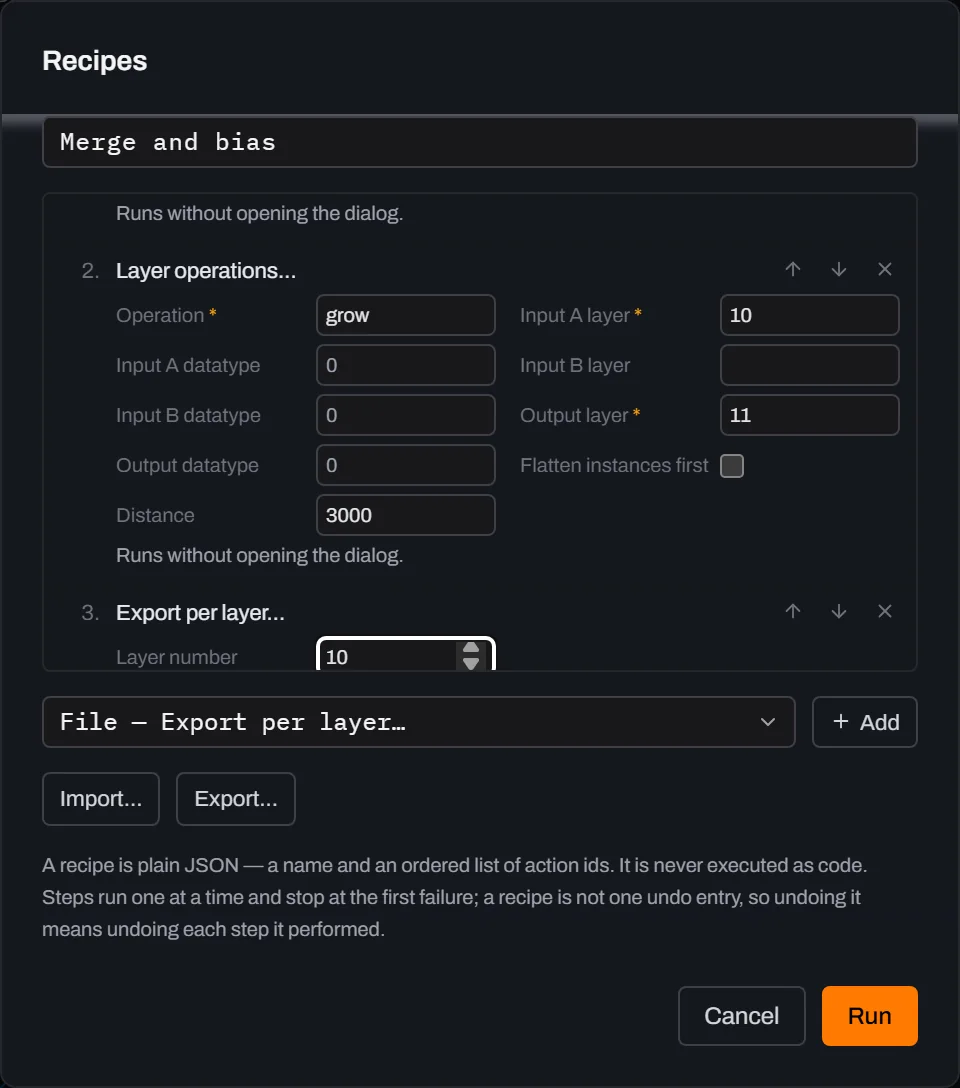 View full image
Run it. Click Run. Each of the three steps reports
running…thendonein its own row, in order — the steps are awaited one at a time, never in parallel. The step list is a short scroll box, and finishing step 3 leaves it scrolled to the bottom, so scroll back up to see steps 1 and 2 both reportingdone. Step 3's evidence is a file, not a row: it downloadsUntitled_L10.gds. That download is a plain browser download link, not the native Save dialog some of Glyph's other exports can use — a recipe step has no user gesture to hang a picker on, so the file always lands wherever your browser puts downloads (its Downloads folder, unless you've told it to ask each time), the same in every browser. (A headless export step writes the one layer you name. Leave the field blank instead and the export dialog opens, where you can pick every layer.)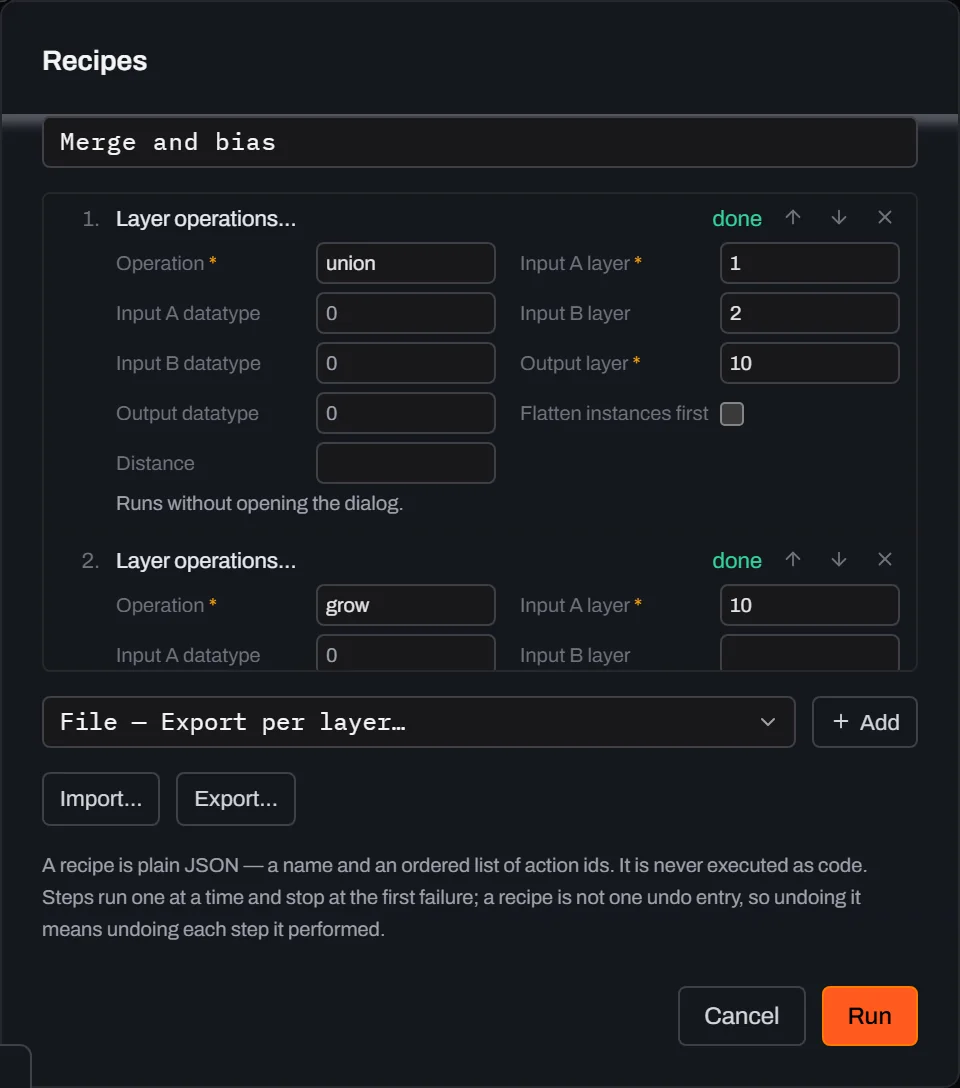 View full image
Close the dialog and look at the result. Press Esc (or Cancel) — after a successful run, closing the dialog only dismisses it. It never rolls anything back; only Ctrl+Z, next, does that. The run's four toasts are still stacked bottom-right: the three newest in full —
1 shape added to 11/0 (new layer).,Exported layer 10andRecipe "Merge and bias" ran 3 step(s).— and the first,1 shape added to 10/0 (new layer)., behind +1 more — View all. Two layers you never created by hand are now in the Layers panel:Layer 10carrying the union of the two boxes, andLayer 11carrying that union grown by 3 µm — visible as the rounded outline standing 3 µm outside it. The inputs are untouched: a layer operation is non-destructive, it only ever adds to the output layer.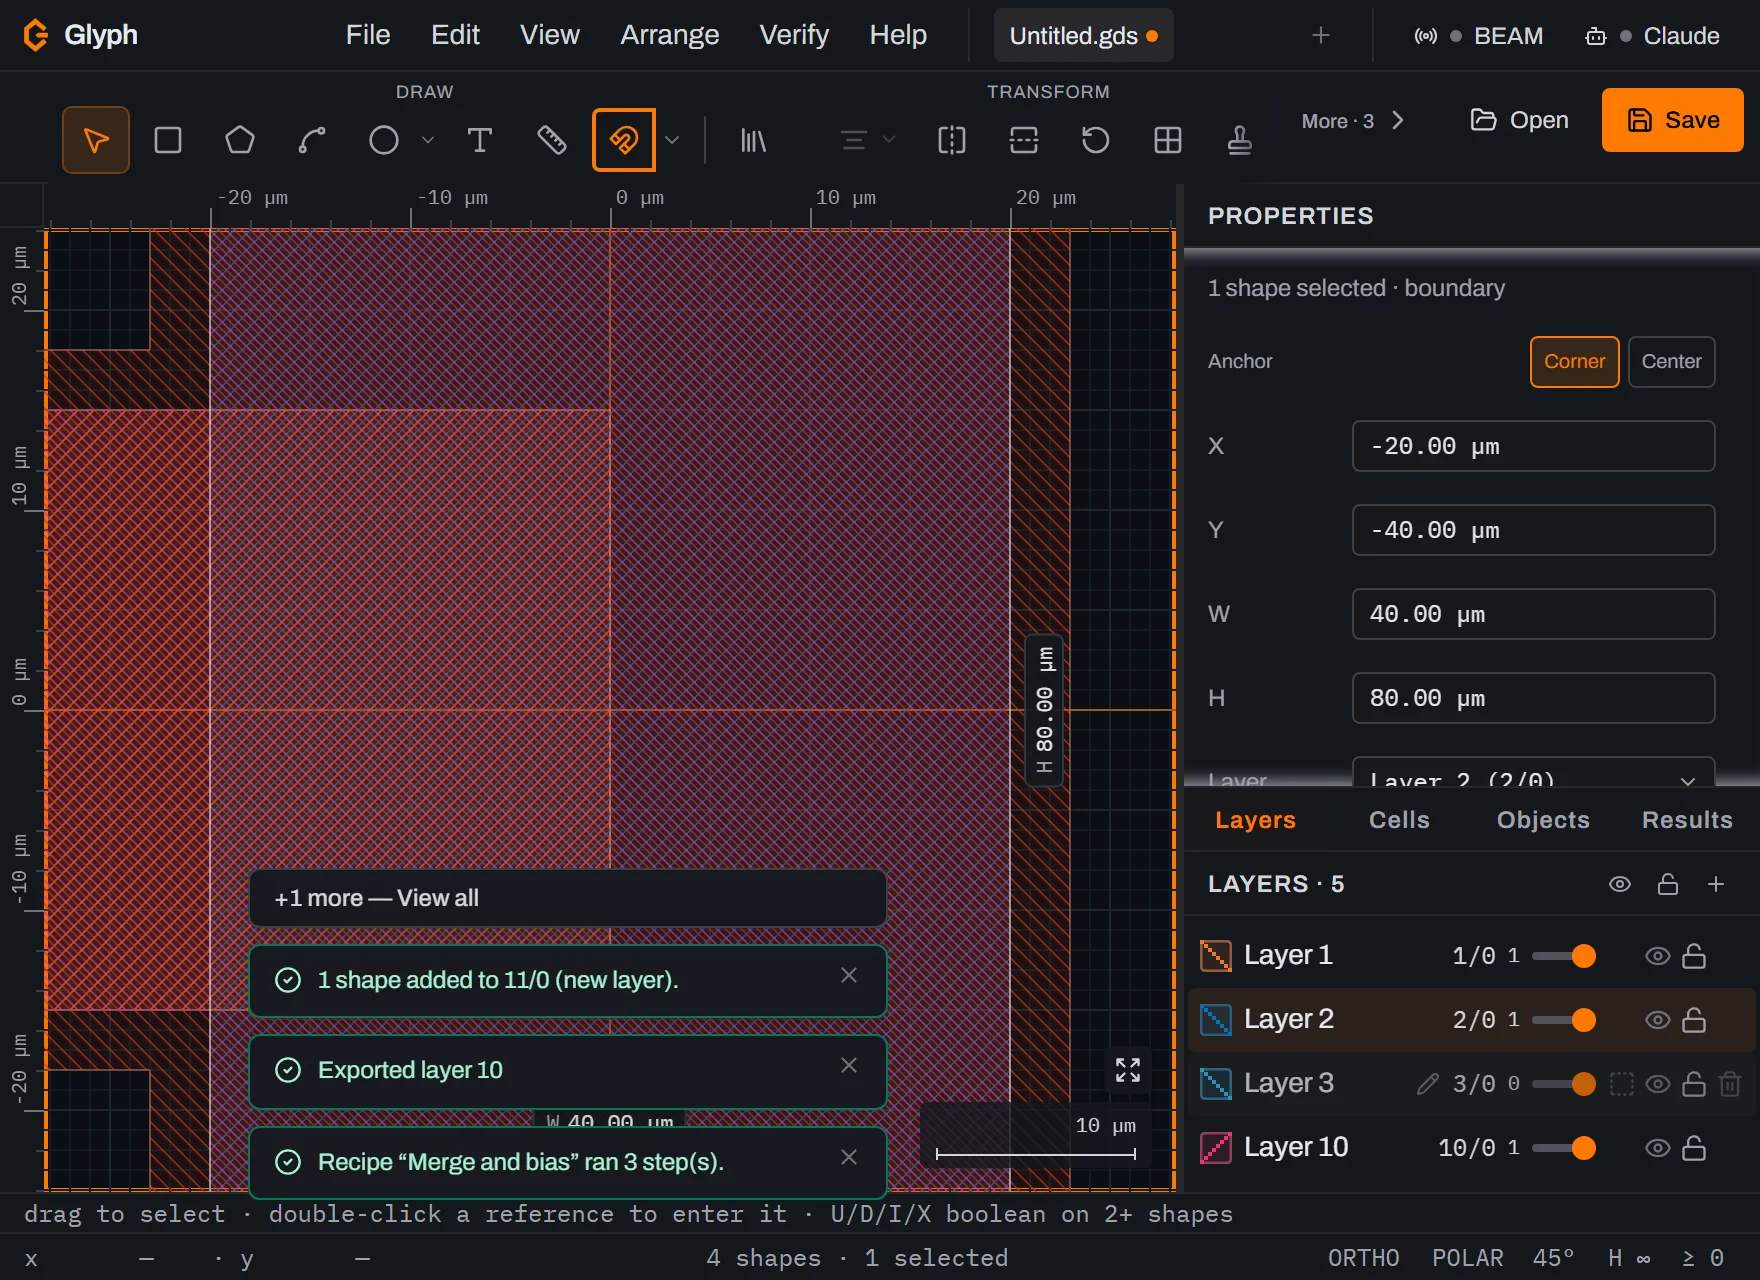 View full image
Undo once — and watch what comes back. A recipe is not one undo entry. Each step dispatches its own commands, so the run left one undo entry per step that changed the document. Press Ctrl+Z once:
Layer 11and its geometry disappear, andLayer 10is still there. Press it again and the union goes too. (The export step changed nothing in the document, so it consumes no undo entry at all — three steps, two entries.)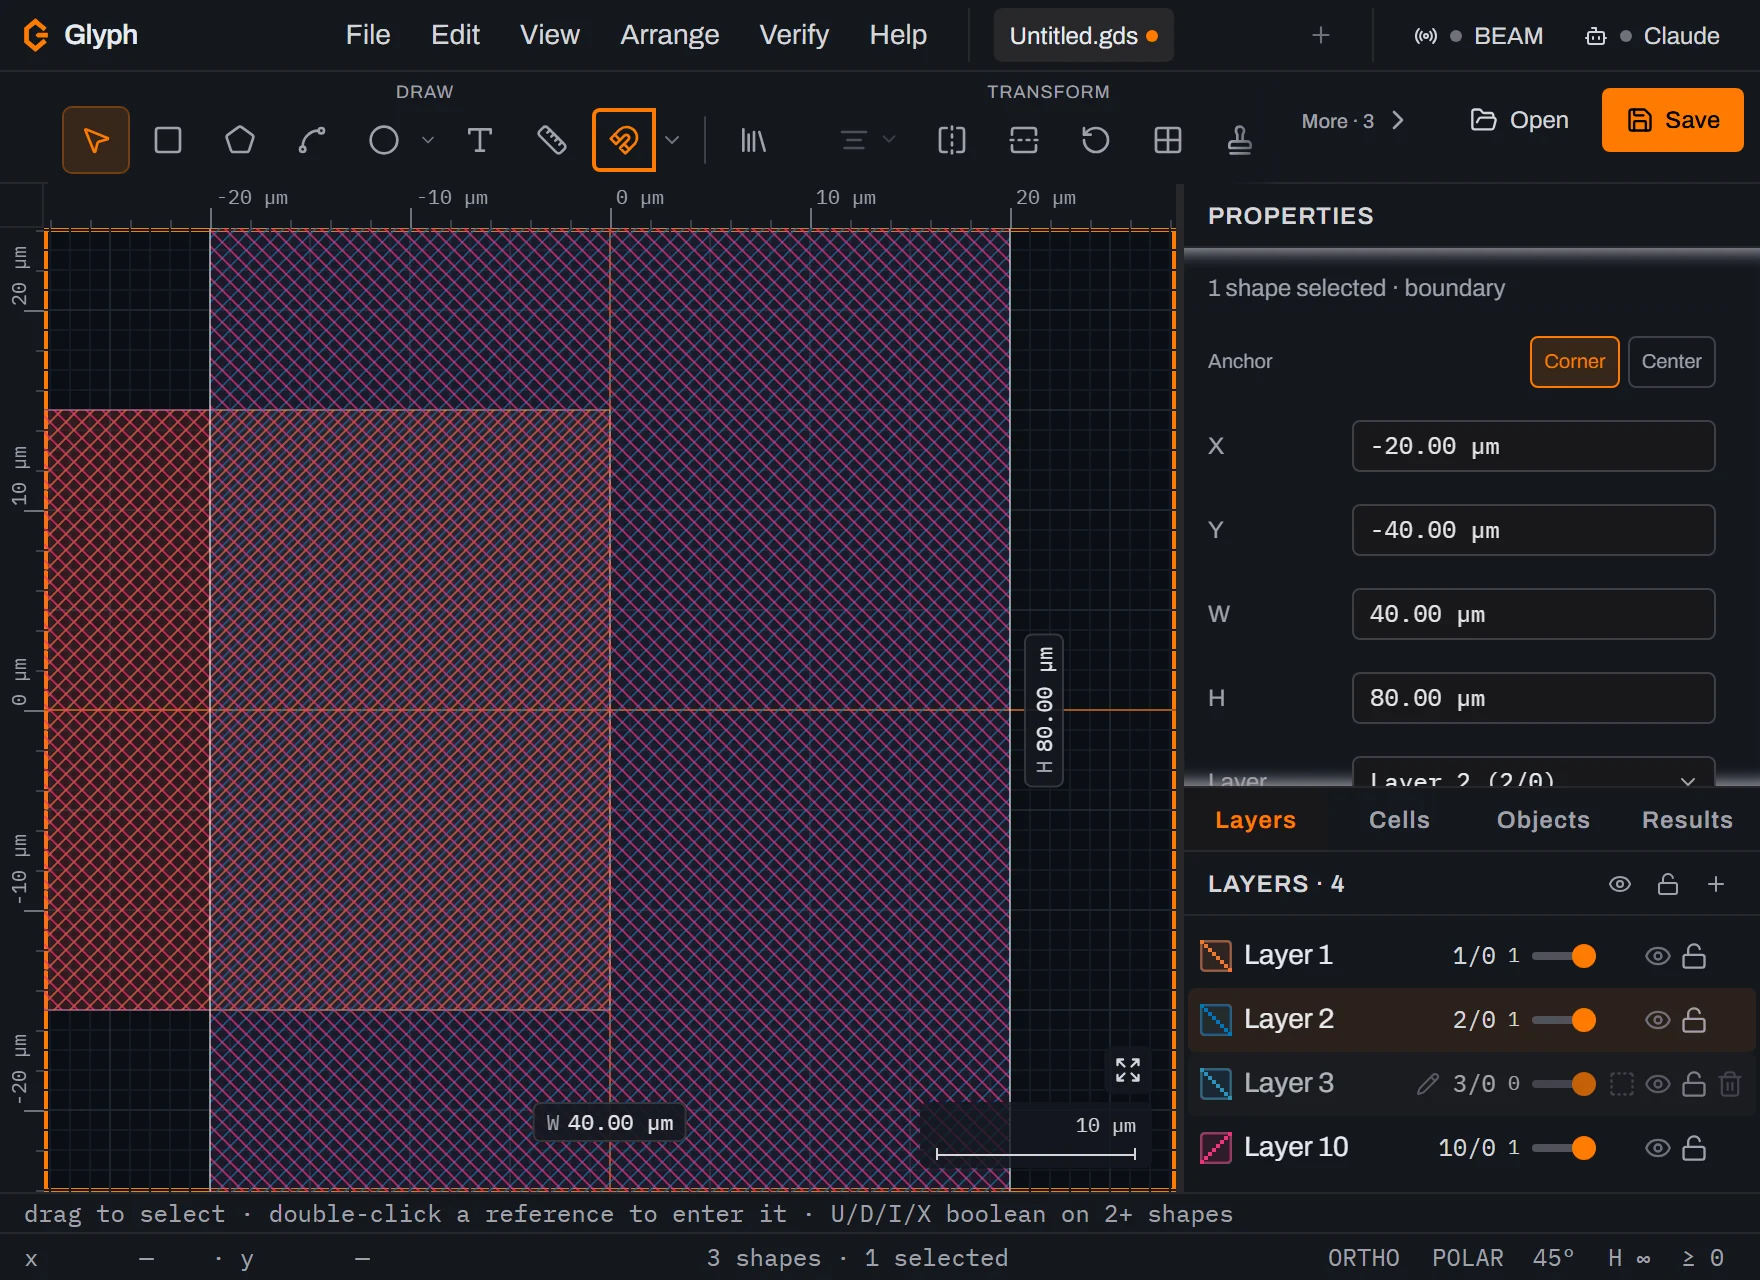 View full image
Change the drawing. Undo the second step as well, so you are back to the two boxes you drew. Click the Layer 1 row again — it isn't necessarily still the active layer after two undos and a dialog in between — arm Box, and drag a third box well clear of the first two: size it to
W 50,H 20,X 40,Y -10(µm), off to the right and touching neither existing box. The status bar reads3 shapes. This is the situation a recipe exists for: same intent, different drawing.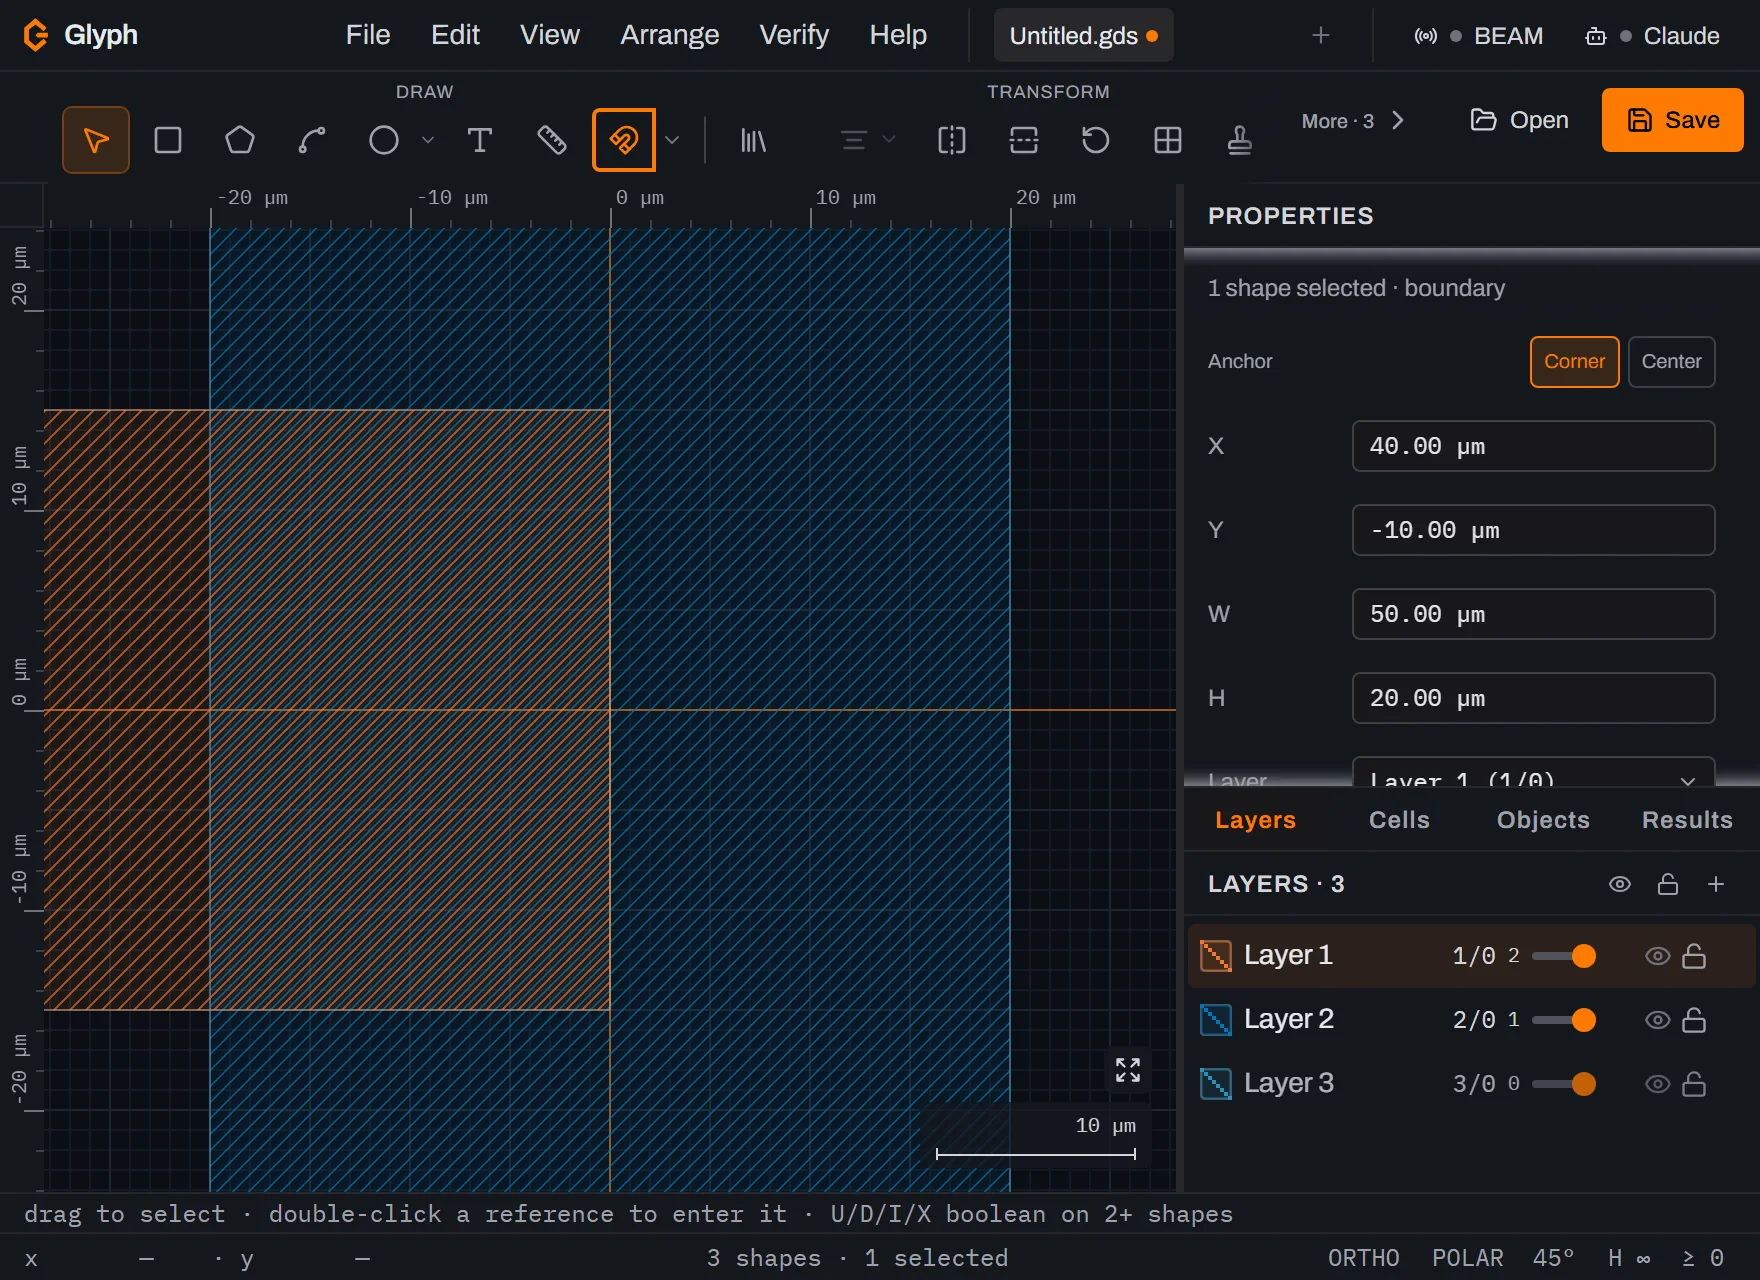 View full image
Run the same recipe again. Re-open — your steps are still there — and click Run. The toasts now read
2 shapes added to 11/0 (new layer).and, behind +1 more — View all,2 shapes added to 10/0 (new layer).: the union found the new box too, and the bias followed. A secondUntitled_L10.gdsis downloaded. Nothing was re-typed, and nothing was remembered by hand.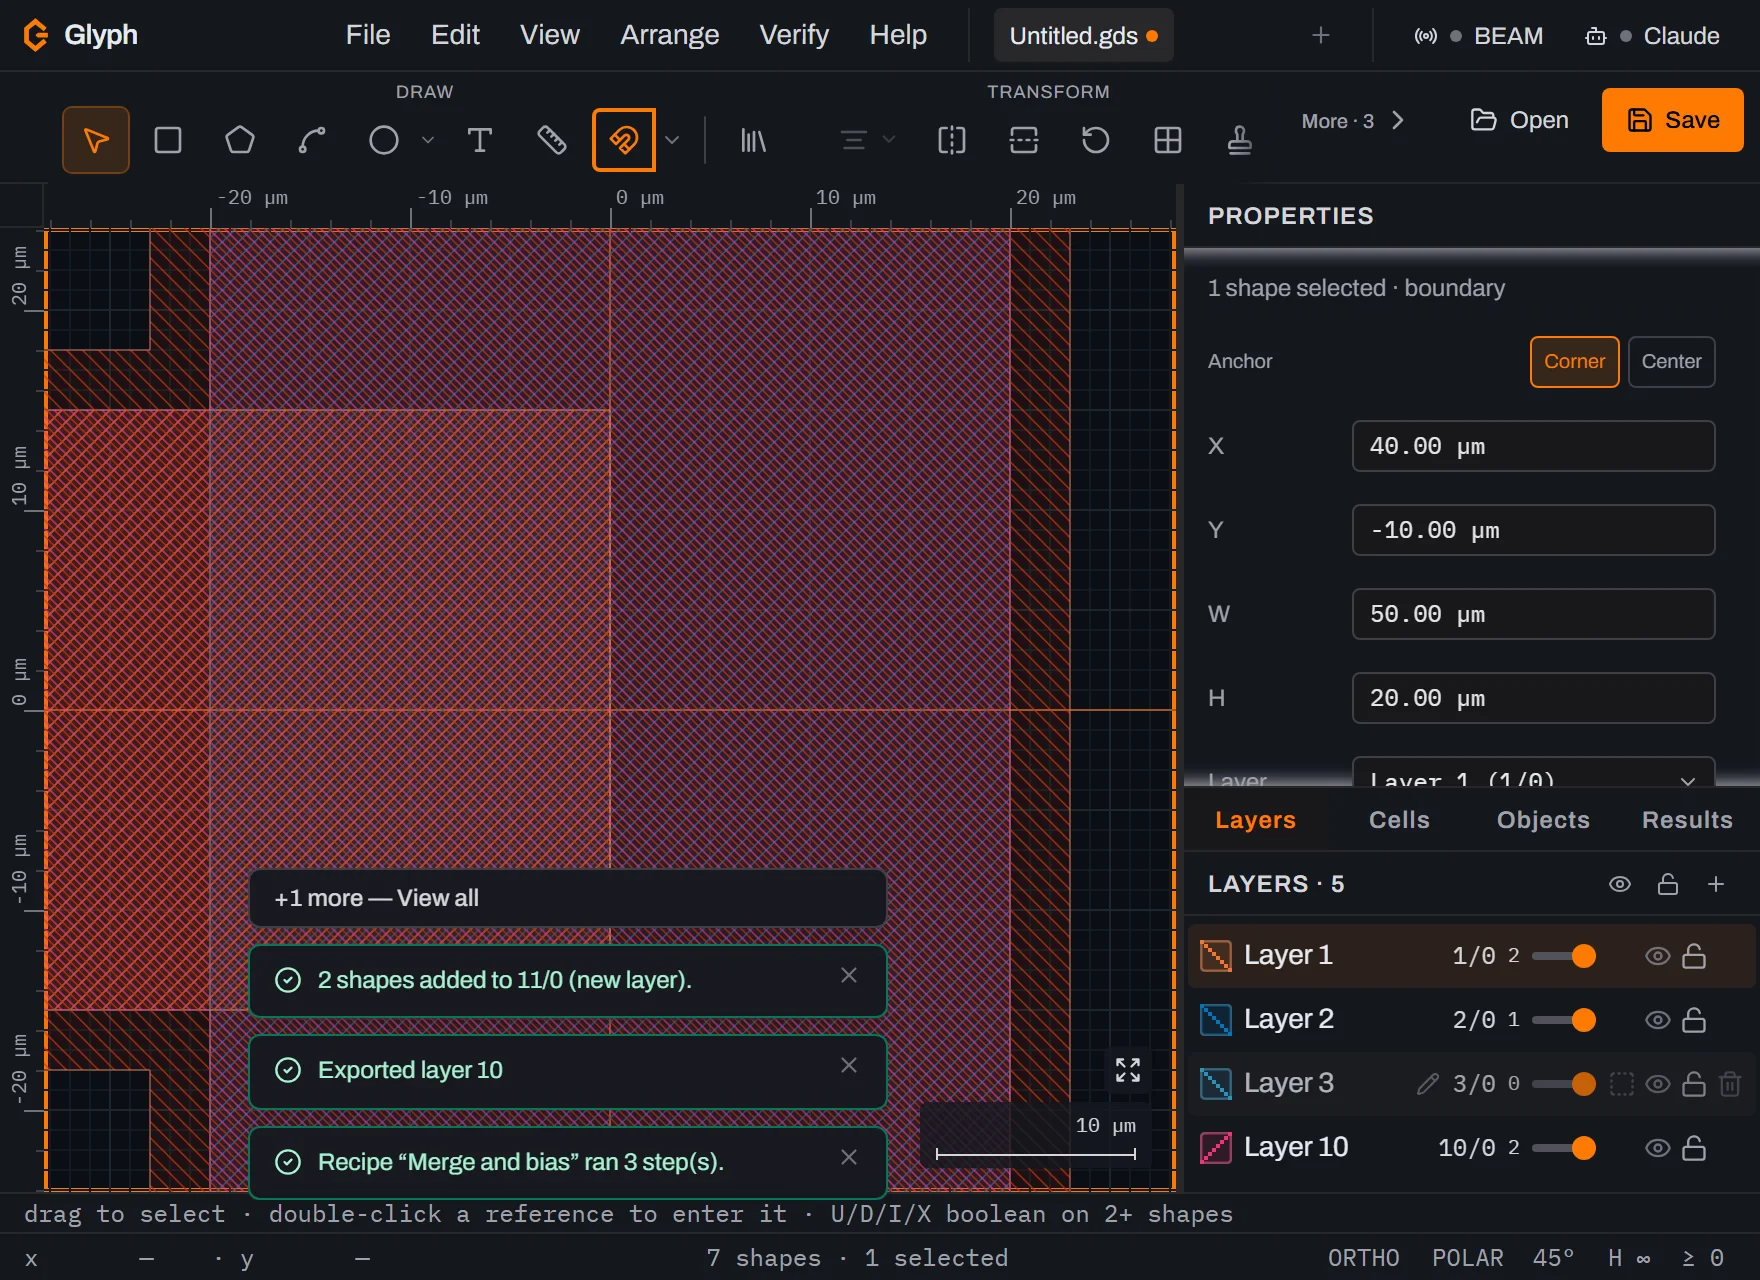 View full image
Keep it, and then break it on purpose. Export… downloads the recipe as
Merge-and-bias.recipe.json— the same plain browser download as step 6's mask file, so it lands in your Downloads folder (or wherever your browser is set to save). It's a name, a version, and the three steps with their parameters, diffable in version control:{ "name": "Merge and bias", "version": 1, "steps": [ { "action": "arrange.layerOps", "params": { "a": 1, "b": 2, "op": "union", "out": 10 } }, { "action": "arrange.layerOps", "params": { "a": 10, "distance": 3000, "op": "grow", "out": 11 } }, { "action": "file.exportLayers", "params": { "layer": 10 } } ] }Open that downloaded file in your text editor, rename the first step's
"out"key to"outLayer", save it, and load it back into Glyph with Import…. The step editor flags it immediately, in red:Unknown parameter "outLayer". Note the Output layer field is now empty — your10is filed under a key the action does not have — and the recipe's own name is untouched, stillMerge and bias, because renaming one JSON key is the only edit this step makes.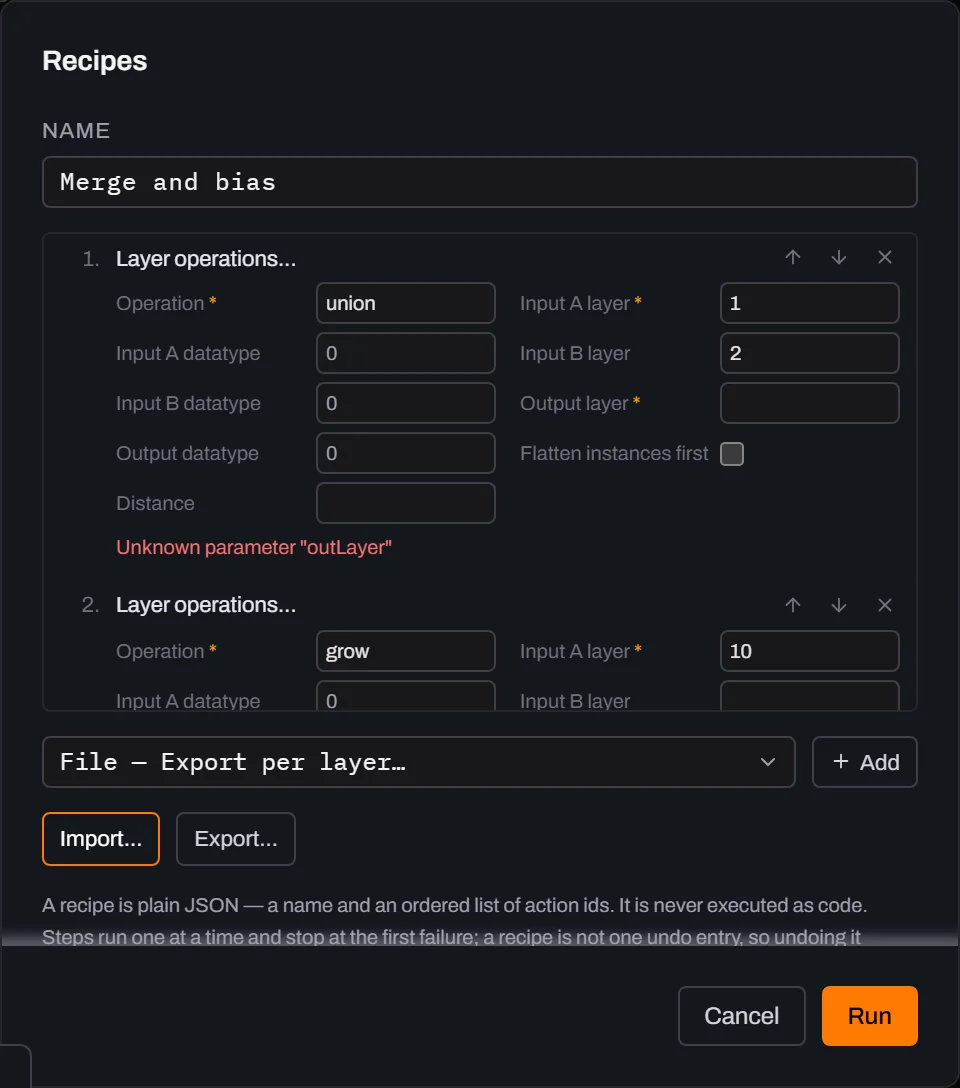 View full image
Run the broken recipe. It stops at step 1 and says so: the step's status reads
failedand a red message appears under it —Step 1 (arrange.layerOps): Unknown parameter "outLayer". This is the safety contract, and it is worth being precise about: an unknown parameter key is refused, never ignored. A typo that quietly did nothing would let an unattended run report success over a layout that is wrong. The same rule covers a wrong type, an action id that is not installed, and any step that throws — the run stops, names the step, and leaves the rest of the recipe unrun. Here nothing ran at all, so the document is untouched — the status bar behind the dialog still reads7 shapes, exactly what it read before this run.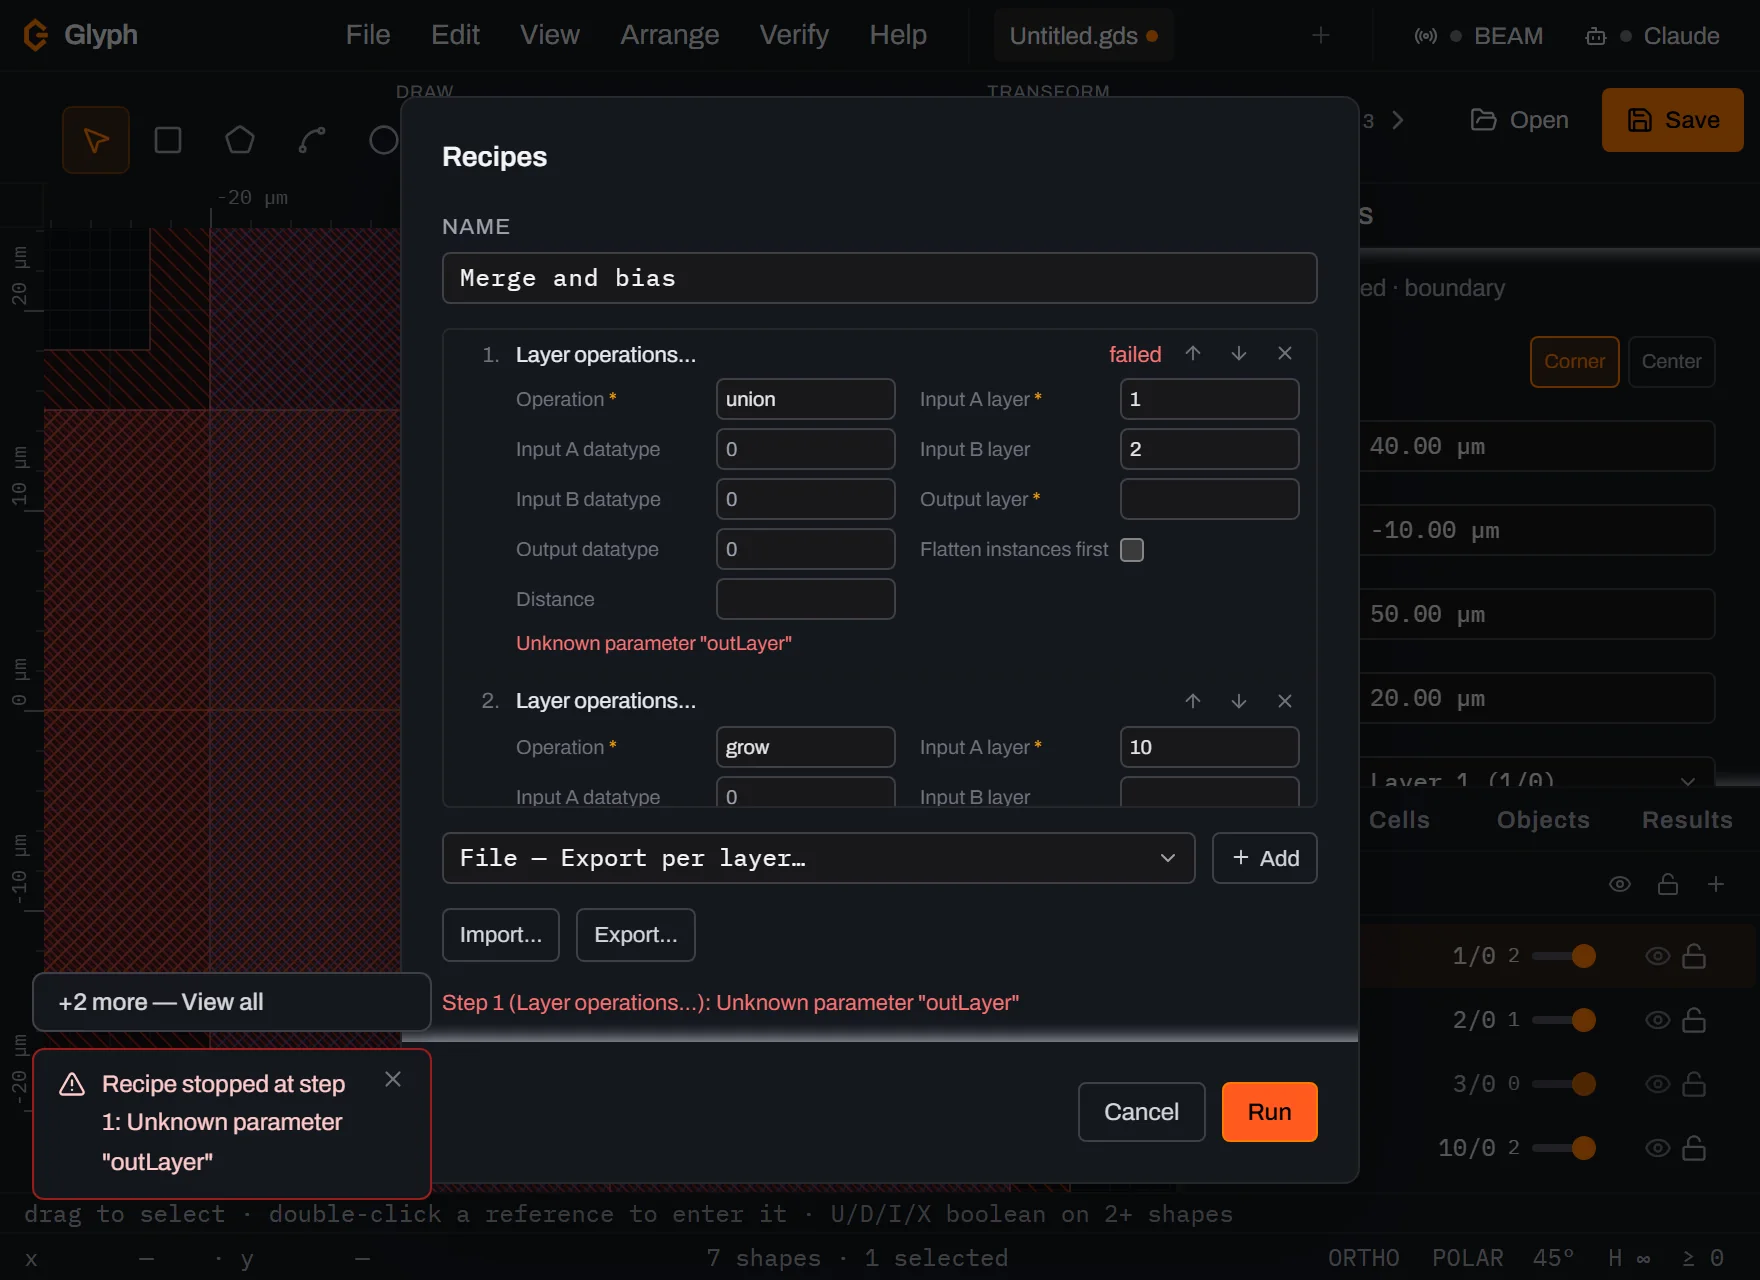 View full image
What you built
A three-step recipe — union 1/0 with 2/0 into 10/0, grow 10/0 by 3 µm into 11/0, export 10/0 — that ran twice, unchanged, on two different drawings, and produced one mask file each time.
Three things to carry away. A recipe is data, not a program: JSON in, JSON out, and it names commands rather than describing logic — there are no variables, conditions or loops, by design. Parameters are opt-in per step: fill a step's fields and it runs with no dialog, leave them blank and the dialog opens exactly as it always has, so old recipes are unaffected. And failure is loud: a bad parameter or a step that cannot run stops the whole recipe and names it, because a run nobody is watching must never report success over the wrong layout.
What a recipe is not: it is not one undo entry (undo unwinds it a step at a time), and it is not saved inside your .gds. The dialog keeps your steps while the tab is open — use Export… to keep one for good.
Next steps
The two parameterised steps have full pages of their own: Arrange and Boolean operations cover what layer operations do and what they refuse, and Layers explains the (layer, datatype) pairs the parameters name. For the export half — including per-layer mask files and what each format keeps — see File I/O. Every action a recipe step can name is also reachable from the command palette; the list is in Keyboard shortcuts. If you want a machine to drive Glyph rather than a saved list, Connecting Claude is the other automation surface. Then open the editor and write down the sequence you keep repeating.