Work faster in Glyph
Every command in Glyph goes through one registry, and this guide is a tour of the four surfaces built on top of it: the command palette that finds any of them by typing a few letters, the cheat sheet that lists every key at once, the keyboard-shortcuts dialog that lets you switch to a KLayout-compatible preset or remap a key of your own, and the ten stored grid presets that put a fixed snap step on the number keys. None of it changes what you can draw — it changes how many menus you have to open to draw it.
- Time: ~10 min
- You'll need: Glyph open on a blank document. Nothing to download, no file to load.
Search for a command. Press Ctrl+K to open the command palette, then type
snap. Snap to grid — the obvious one — comes first, then Object snap, then a longer tail: the six Align … commands, each with a dim line reading Matched "snap edges" (a hidden keyword, so the row says why it is there), and further down Maximise canvas (hide panels). That row isn't a mistake either: the palette's fuzzy matcher acceptss,n,a,pas a subsequence anywhere in the group + label text, not as a literal substring, and "Maxismise canvas (hide panels)" happens to spell it out in order. Every action Glyph knows about is searched this way, so a few letters in the right order are enough — you don't need the exact wording of the menu item, but an unrelated command can occasionally ride along. (The screenshot below was taken before Object snap and the matched-keyword lines existed, so it shows fewer rows.)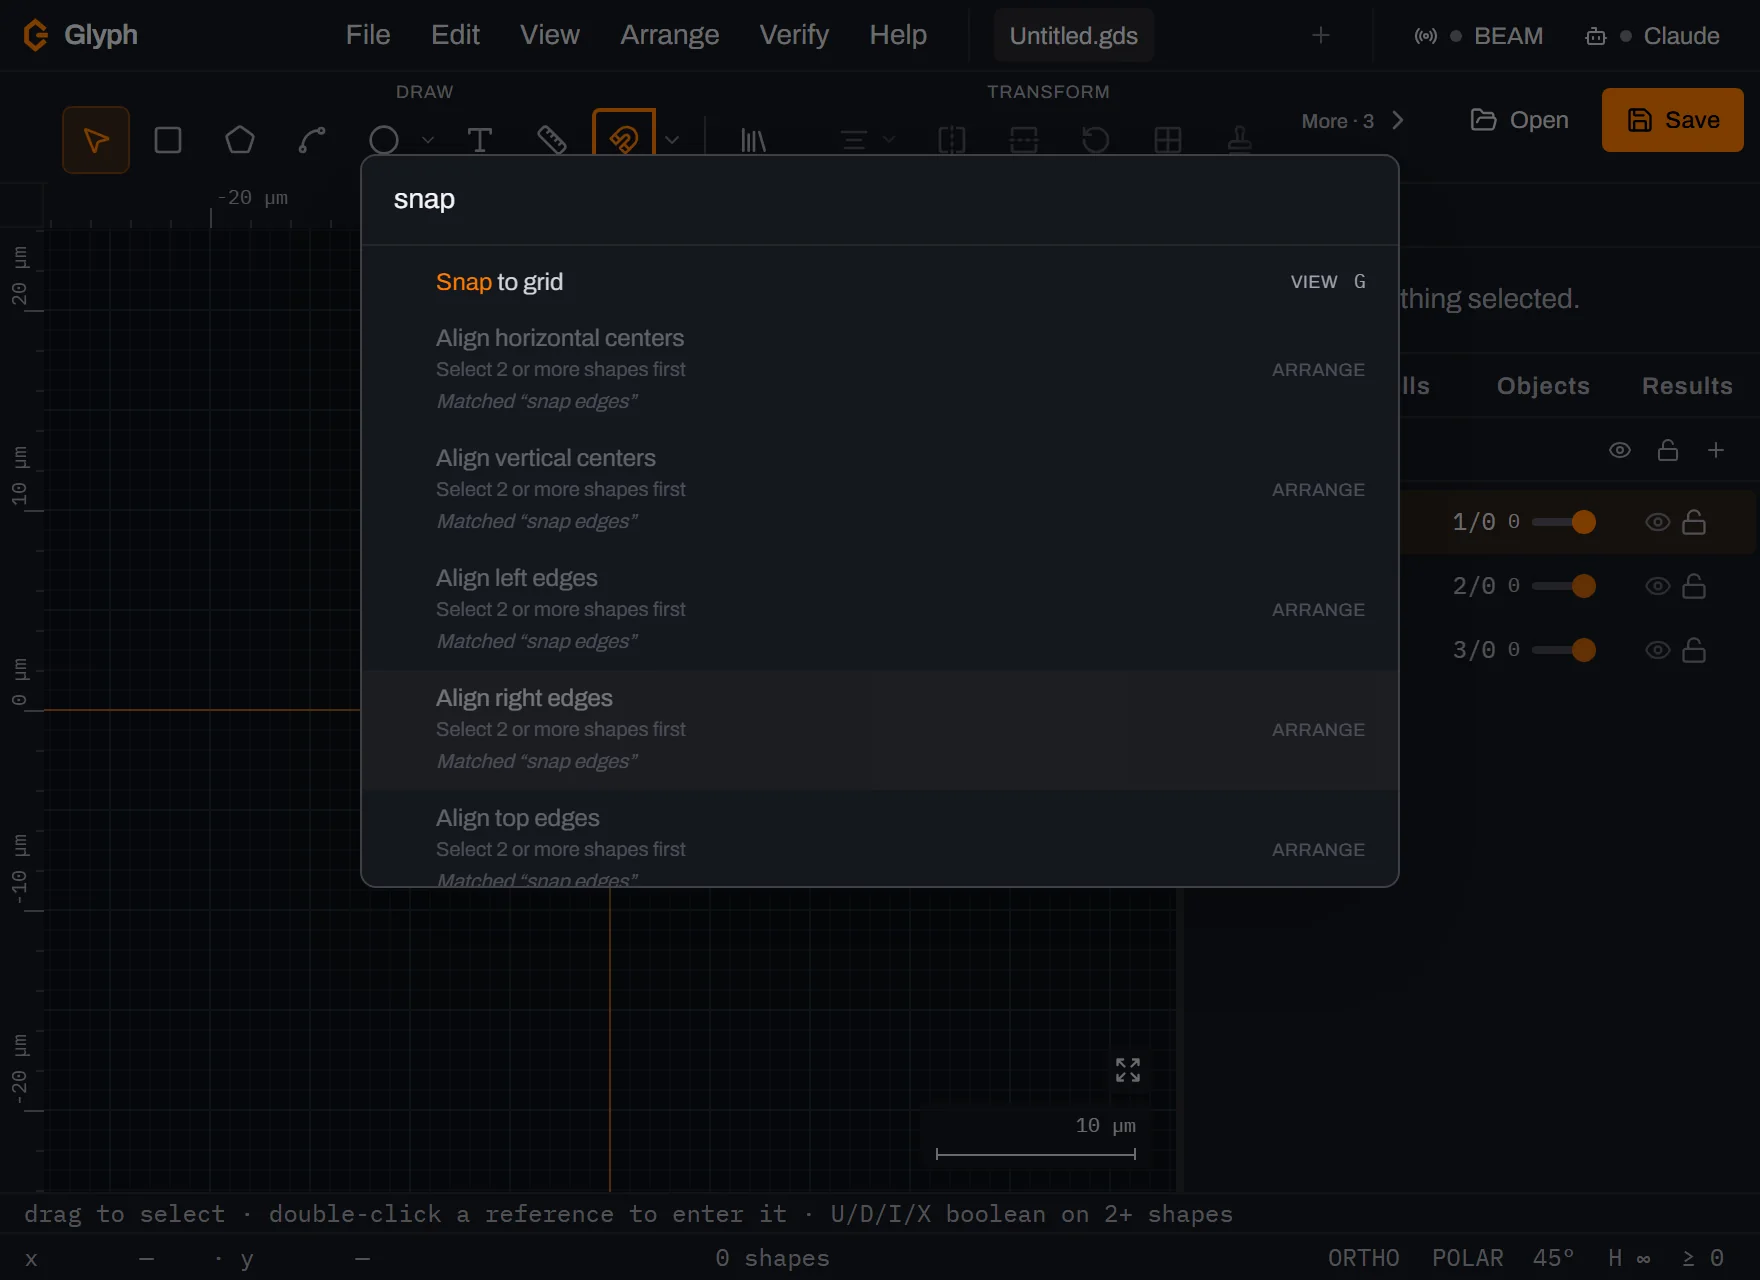 View full image
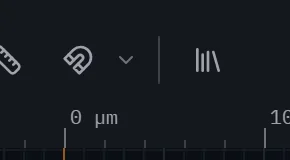
Watch it take effect immediately. Click Snap to grid to run it — it toggles snapping, the same as pressing G. Snap is on by default, so on a fresh document this click turns it off — if the magnet is already grey by the time you get here, this same click turns it back on. Look at the toolbar behind the palette (visible in the last screenshot too): the magnet-and-chevron icon at the end of the Draw group, just left of the divider into Transform, was lit accent-orange; the instant you click, it turns grey (or the reverse, if you're turning it back on). That's the real confirmation that the toggle worked, sitting right where you clicked — not something you have to hunt for four steps later.
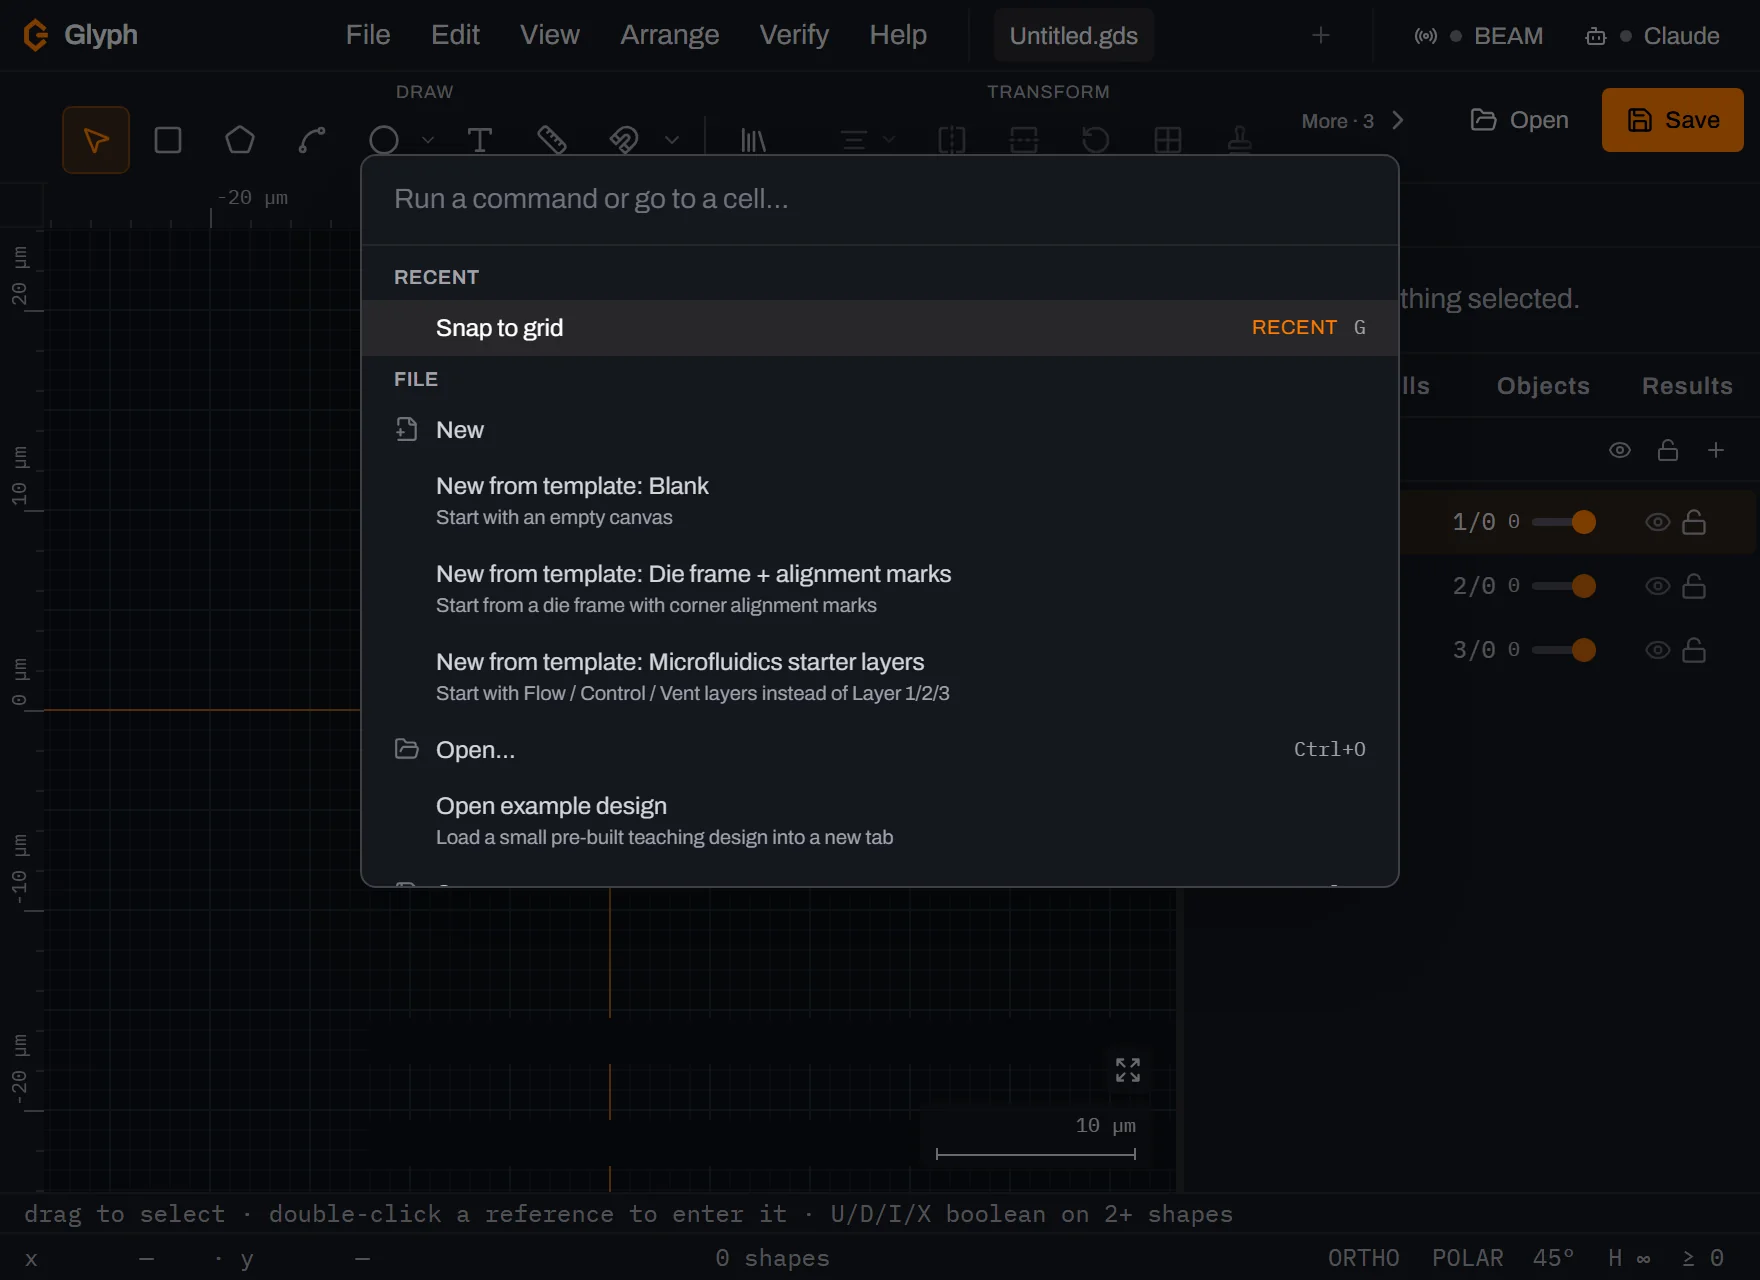
See it float to the top as Recent. Press Ctrl+K again with an empty search box. The command you just ran floats to the top of the list under a RECENT heading, ahead of every File command below it, so the handful of things you're actually doing today stay one keystroke away without you pinning anything.
 View full image
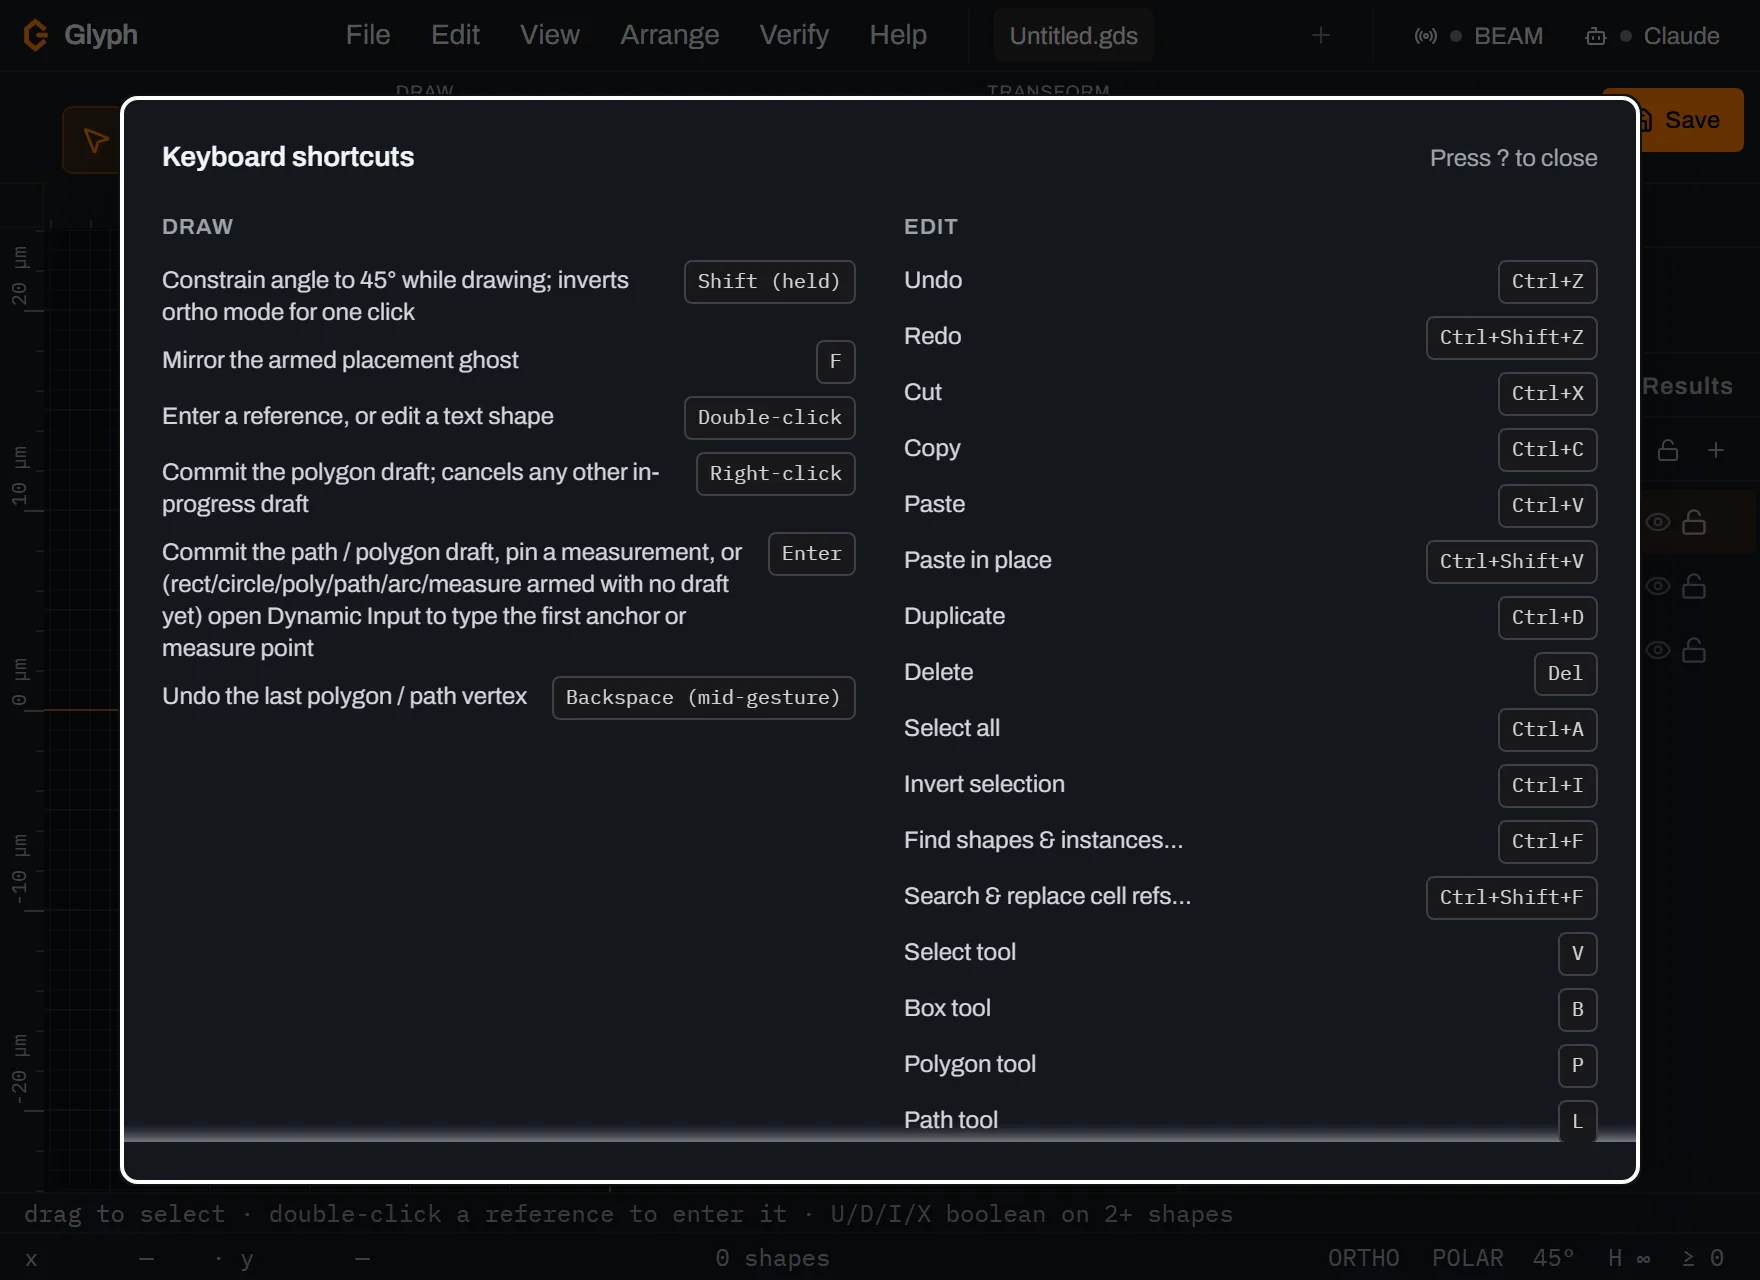
See every key at once. Close the palette and click the ? shortcuts button in the bottom-right of the status bar (or just press ?). This overlay lists every current binding, grouped by Tools, Draw, Edit, Arrange, View, Verify, File and Help — and it always reflects whatever keys are actually bound right now, including any preset or remap from the next step. It's titled Keyboard shortcuts, the exact same title as the dialog you're about to open — but they're two different surfaces: this one is read-only signage — its own corner label reads "Press ? to close" (Esc also dismisses it, though the overlay doesn't advertise that key), and nothing here is editable — while the dialog in the next step is where presets and remaps actually happen.
 View full image
Switch to the KLayout preset. Open — the editable dialog the cheat sheet only displays — and change Preset from
Glyph (stock)toKLayout. This preset binds only what klayout.de documents or KLayout's own menus ship — nothing invented: F2 fits the whole cell, Shift+F2 fits the selection, Ctrl+B duplicates, Ctrl+D enters the selected instance's cell, M arms Select, and the hierarchy keys. The dialog says, in its own words, "Switching preset clears your personal overrides" — which is exactly why this guide remaps a key of its own only at the very end (step 11), after switching preset, not before: doing it the other way round would switch presets and silently wipe the remap. If you ever want to undo everything this guide does, the same dialog's Reset to defaults button (next to the Preset dropdown) clears every override and returns you to Glyph (stock) in one click. The first of the KLayout preset's keys is right here: F2 now zooms to fit the whole cell (the marker stepper that used to own F2 is deliberately unbound rather than guessed into a new home).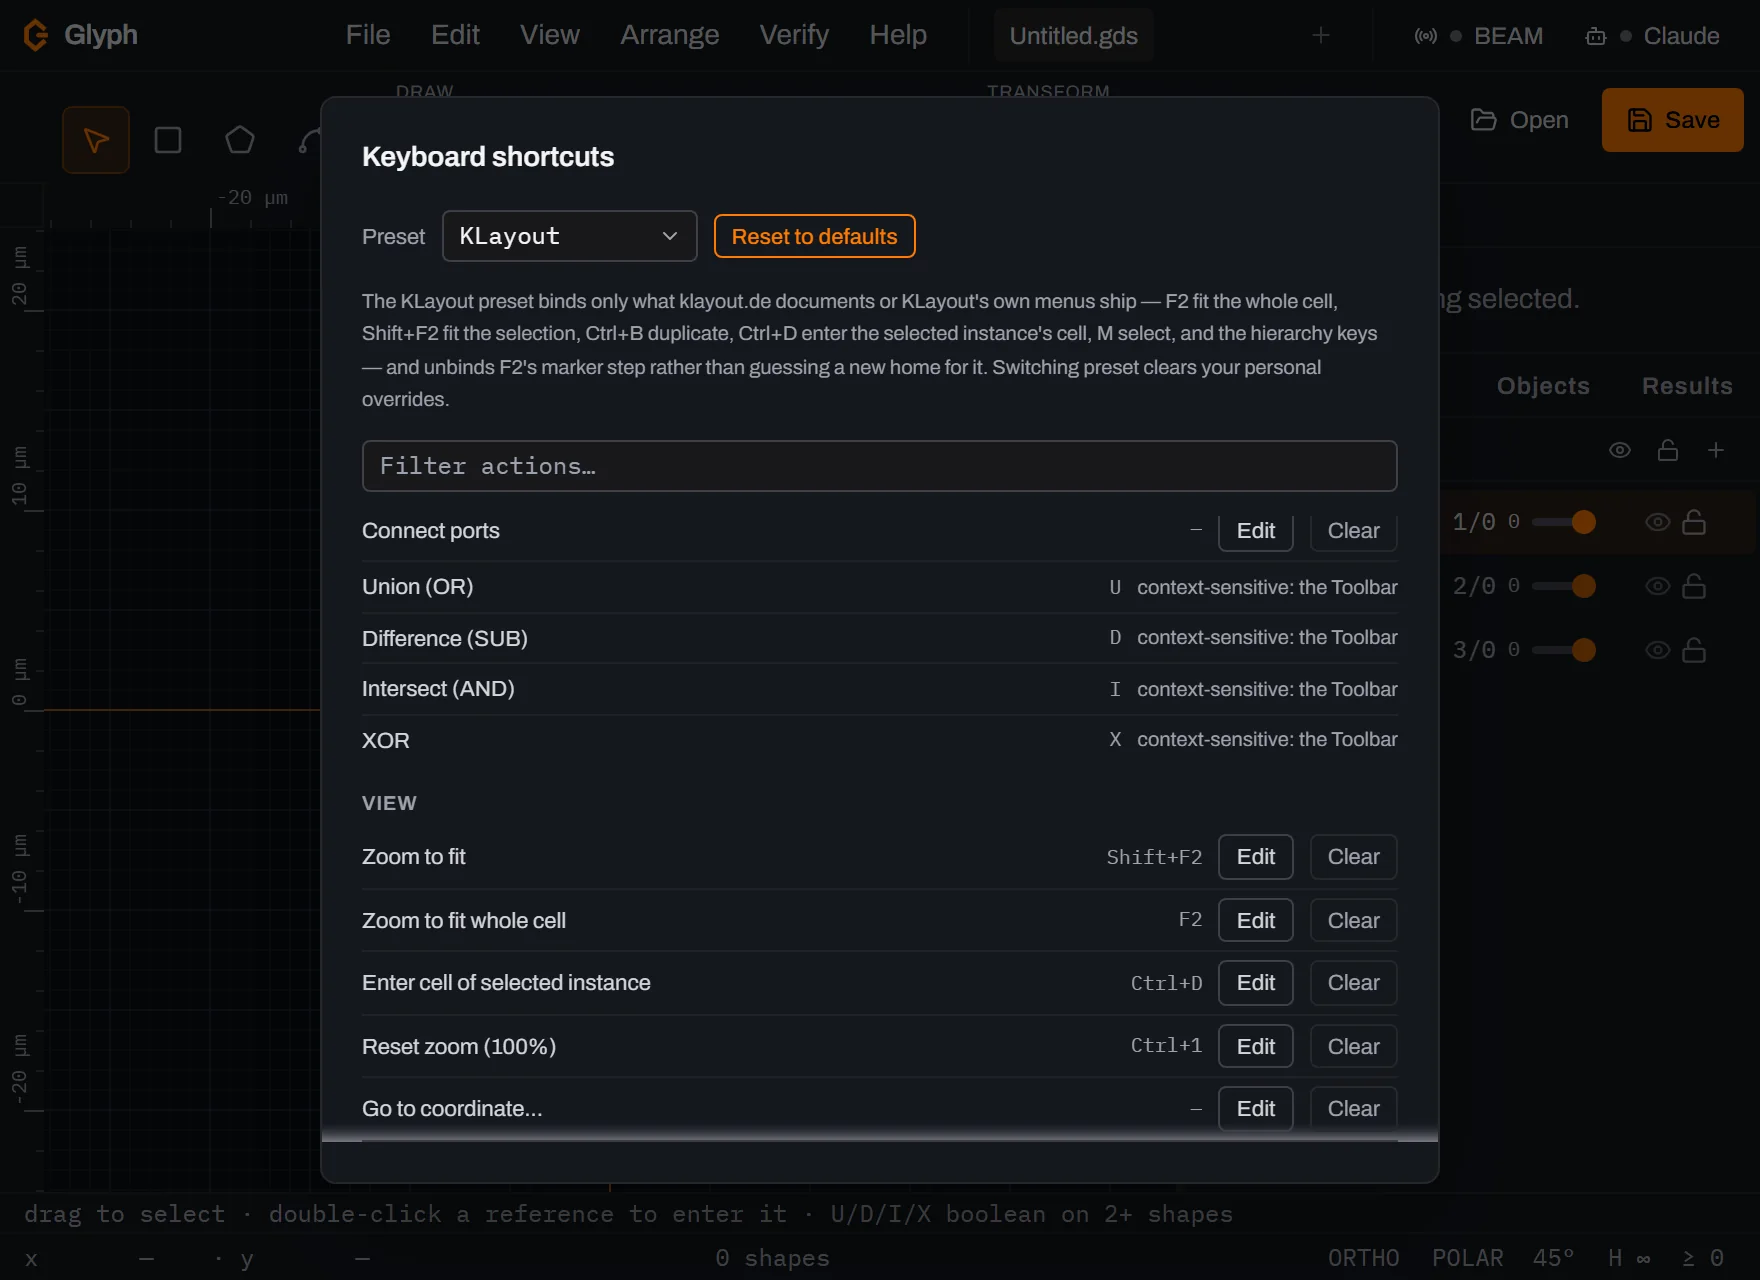 View full image
Scroll to the other five. Further down the same View group, past the ten grid-preset rows, sits the hierarchy cluster:
*shows every level,0collapses instances to boxes,1shows the top level only, and+/-step the depth one level at a time. Those six, with Shift+F2, Ctrl+B, Ctrl+D and M from step 5, are the KLayout preset in full.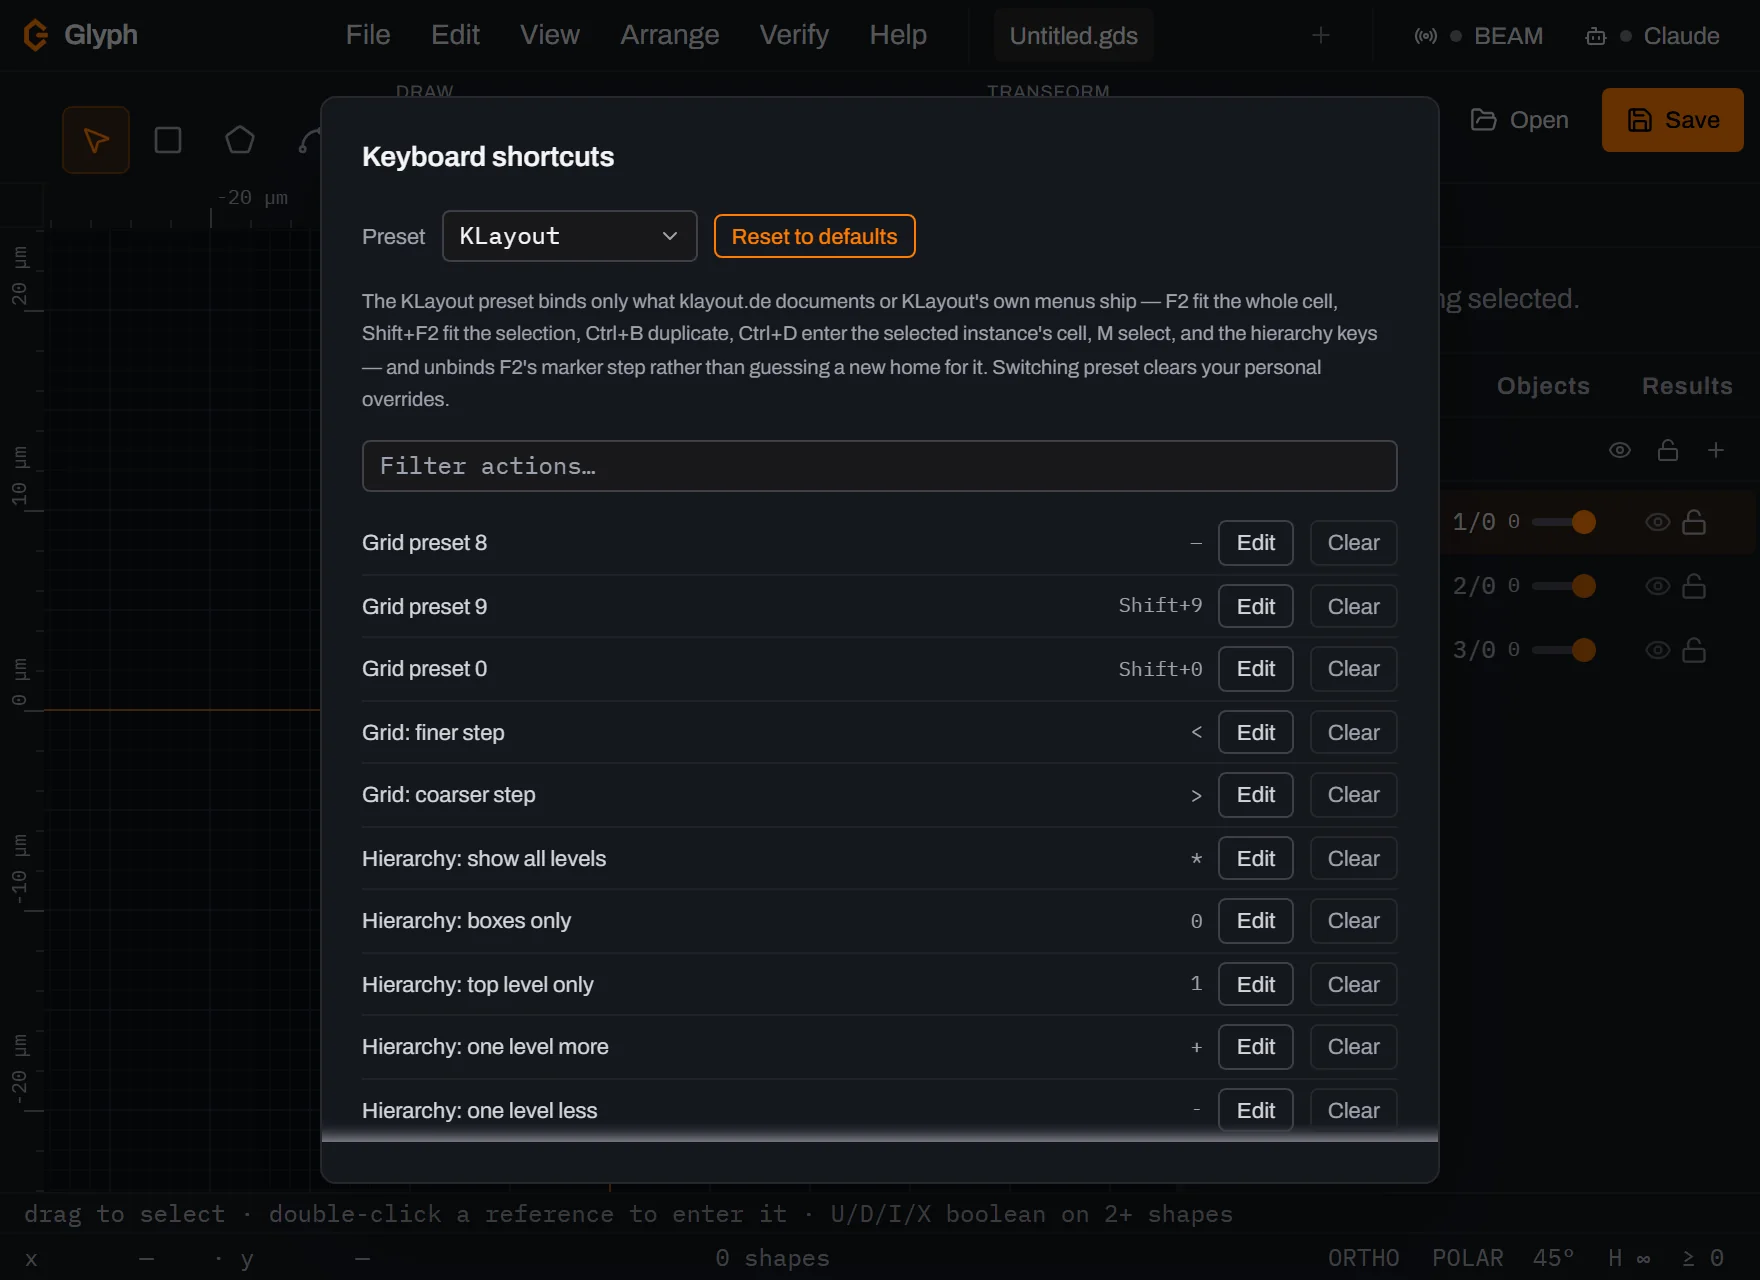 View full image
Find the grid presets. Close the dialog and open . This submenu lists ten stored snap steps, one per number key, with their live values — not
Shift+1,Shift+2… as abstract labels, but the actual distance each one will apply, right now, from a fresh install: 0.001 µm up to 100.000 µm. The row just above it, Snap to grid: off, is the same toggle from step 2 — still off, still readable here too, alongside the toolbar icon. One row shows no key: with the KLayout preset on, 5.000 µm has noShift+8, because on most keyboardsShift+8is the*that shows every hierarchy level; the stock preset keeps it.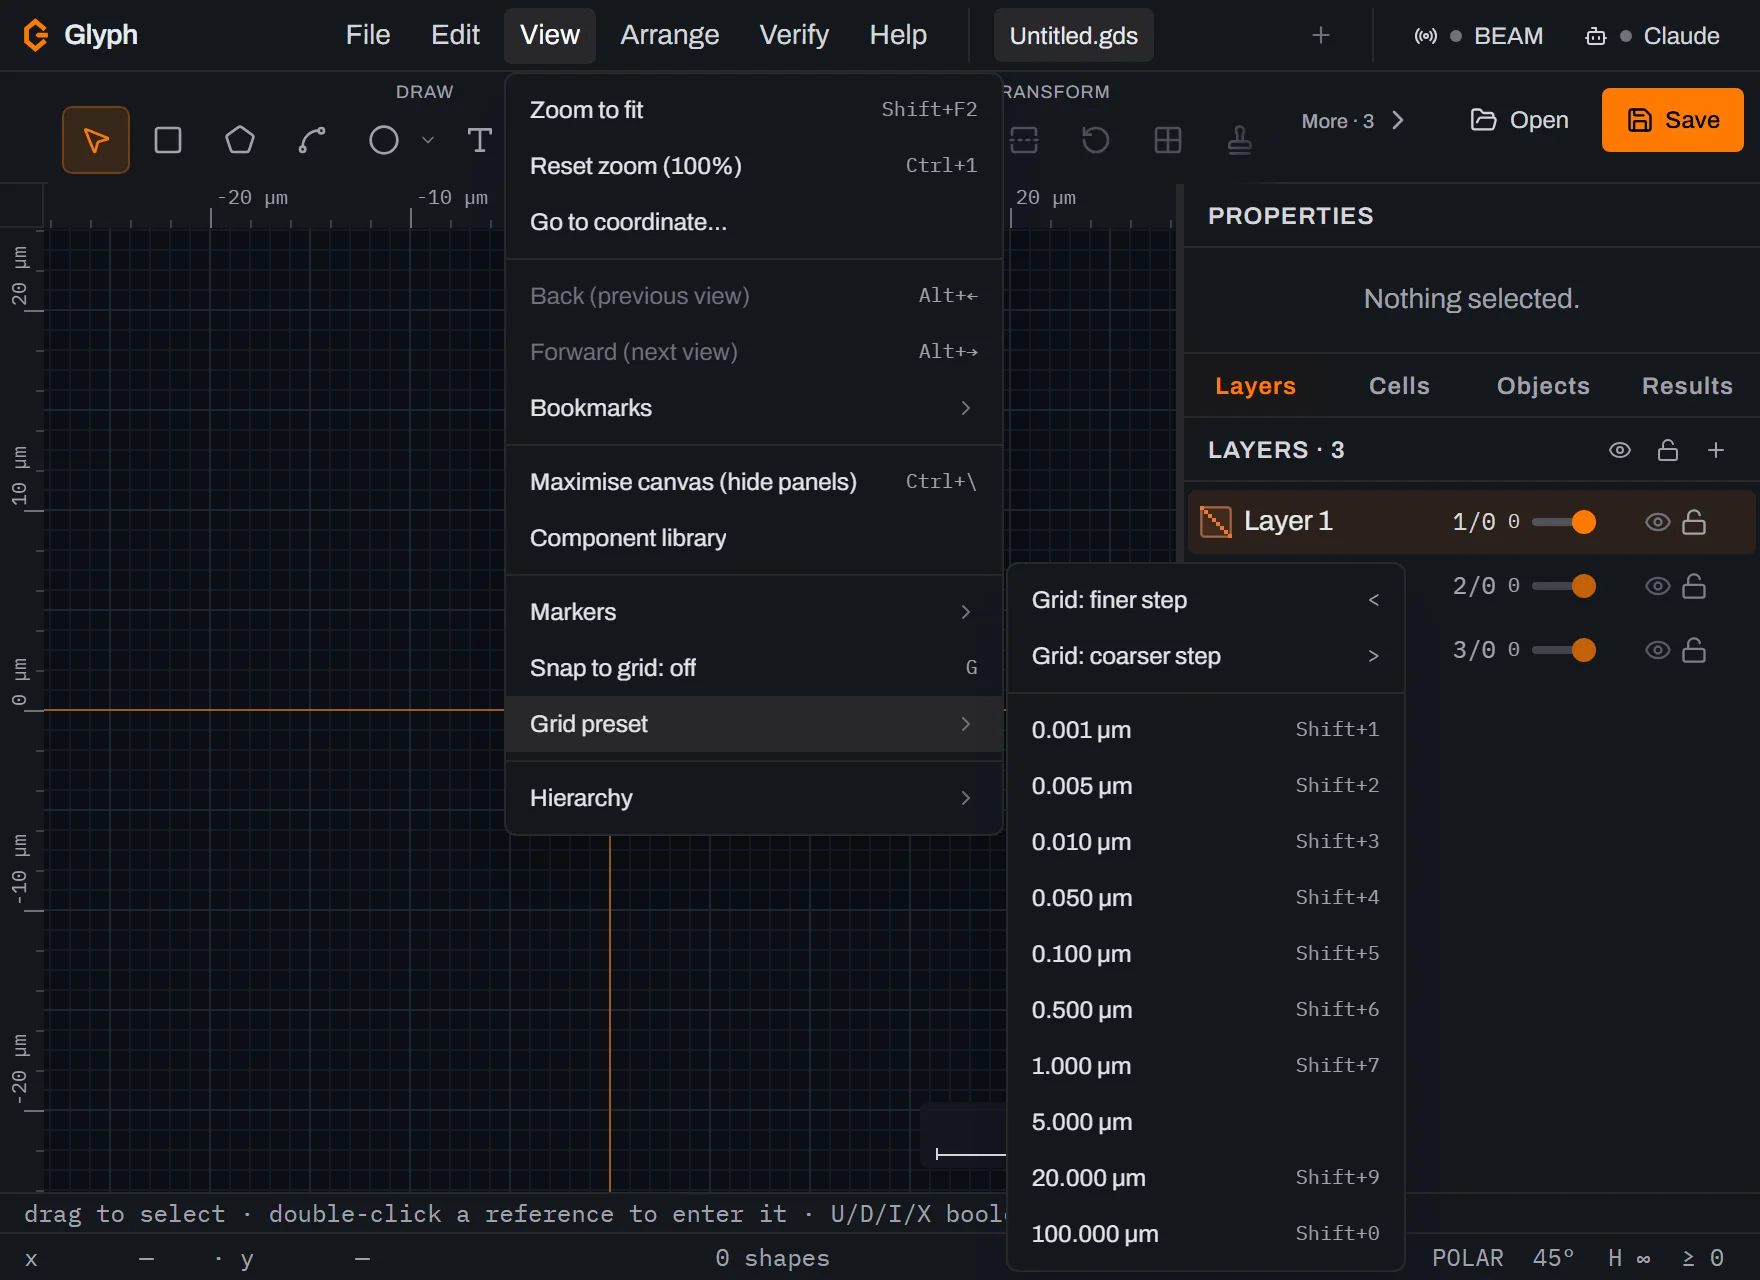 View full image
Edit them. The same ten values live in , each as a plain nanometre field you can type into directly. The panel explains why they're on Shift+digit rather than the bare digits: the KLayout preset you just switched to already claims
0and1for hierarchy levels, so the two migrant reflexes — Clewin's number-key grid and KLayout's hierarchy keys — don't collide.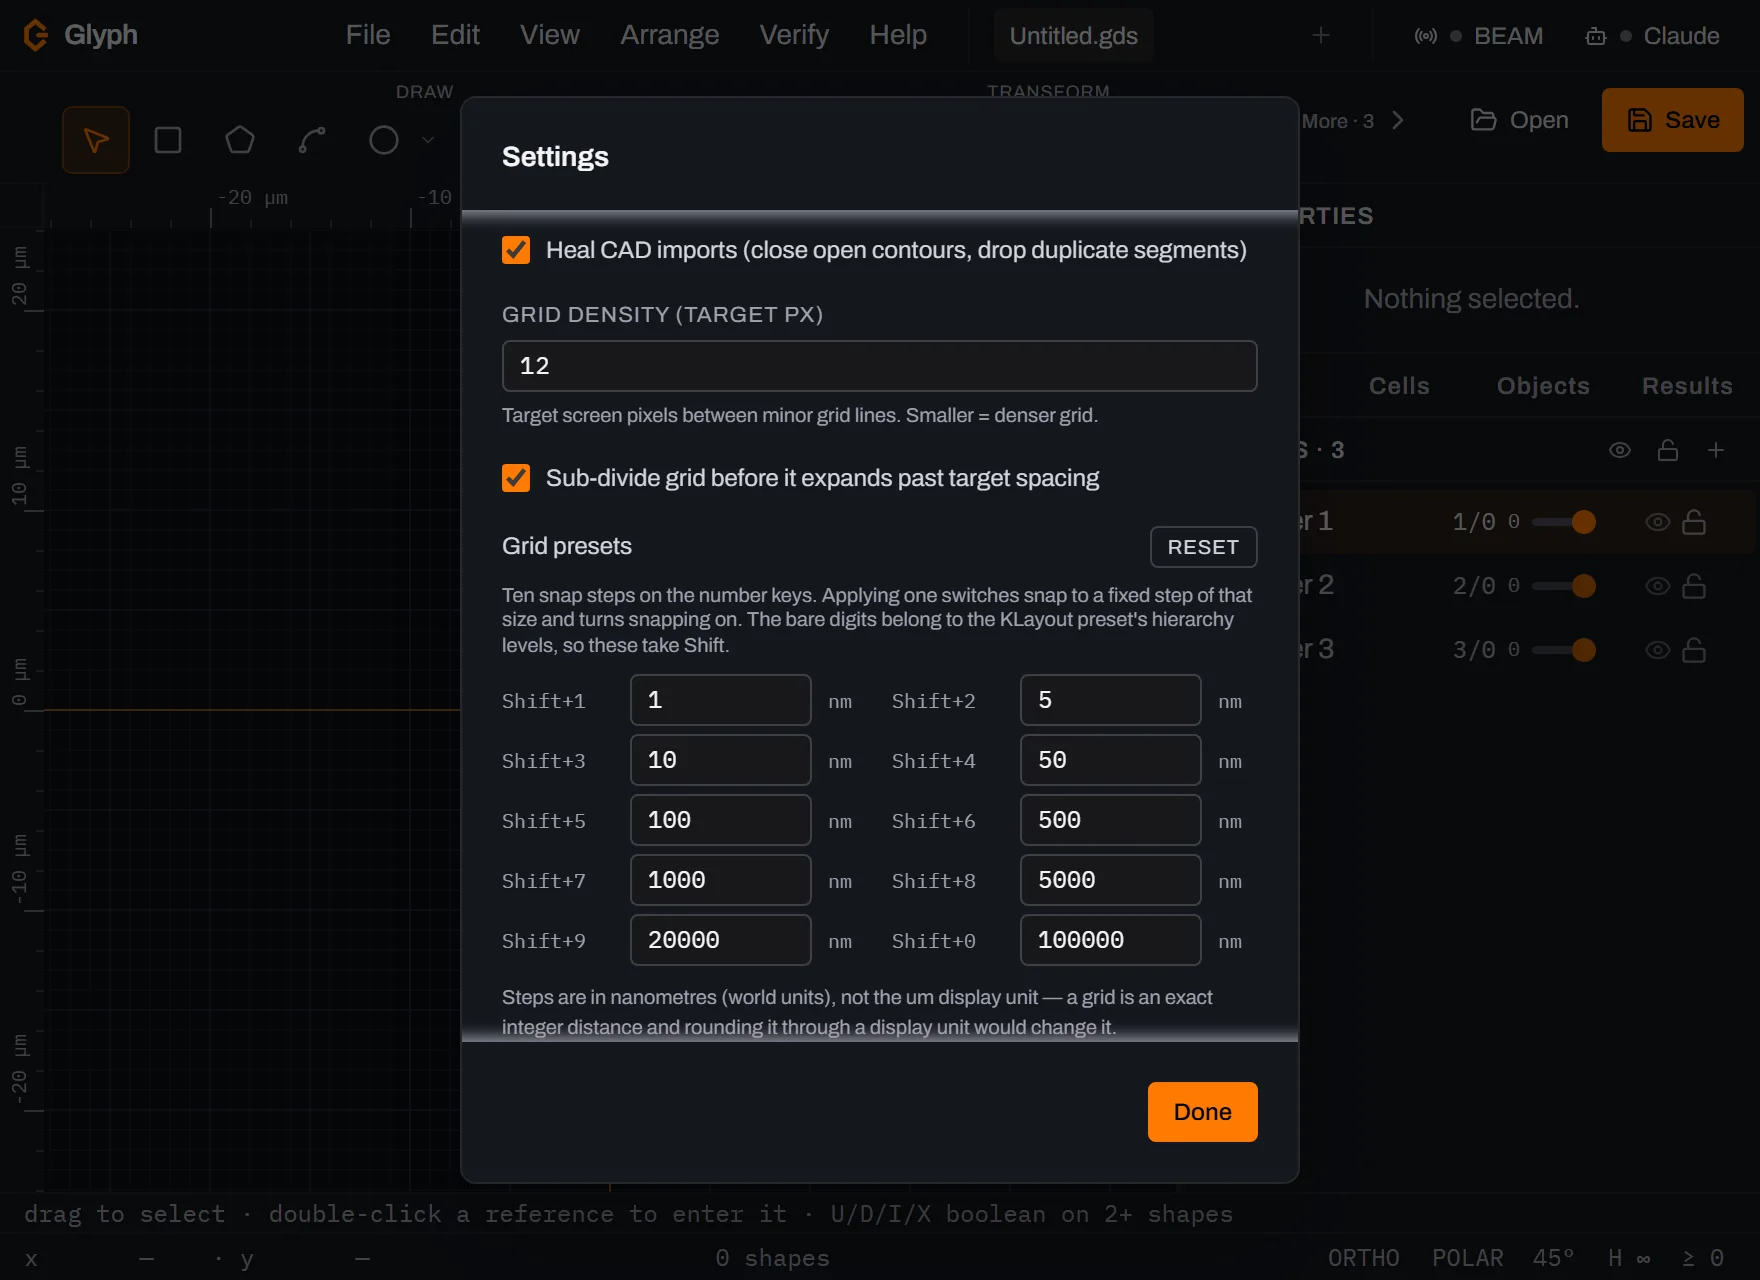 View full image
Apply one and watch the confirmation. Back on the canvas, open again and click 1.000 µm (
Shift+7). Applying a preset switches snap to that fixed step and turns snapping on: a toast pops up in the corner reading Grid 1.000 µm, and the scale bar in the canvas's bottom-right corner — a ruler whose length is always a round number of grid cells, so it is a visible trace of a step a keypress alone wouldn't otherwise leave — now reads 10 µm: ten of the new 1 µm cells at the default zoom.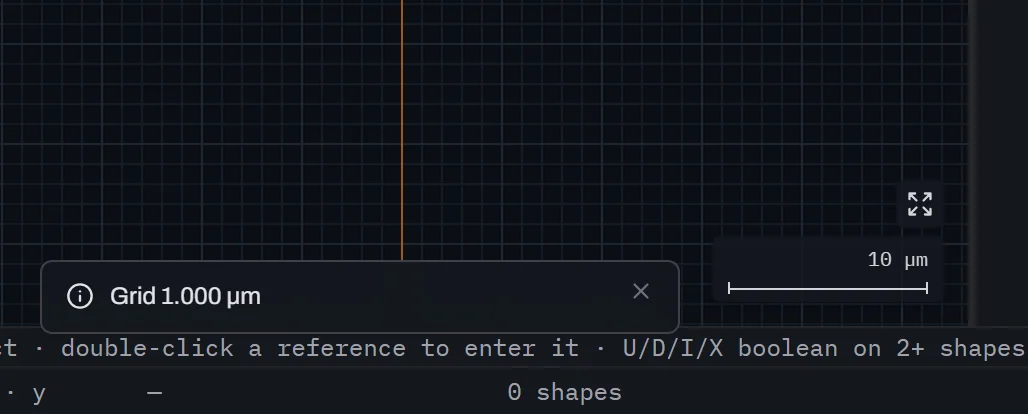 View full image
Switch again, from the palette. Press Ctrl+K, type
grid preset 9— the palette row for it is labelled Grid preset 9 — and run it — the same actionShift+9would trigger, this time found by search instead of by key. It applies the 20 µm preset (Shift+9): a second toast appears below the first, reading Grid 20.000 µm, and the scale bar now reads 20 µm — at the same zoom a visibly longer bar for a larger step, the before-and-after of one preset switch. The stacked toasts cover the bar's left end until they time out.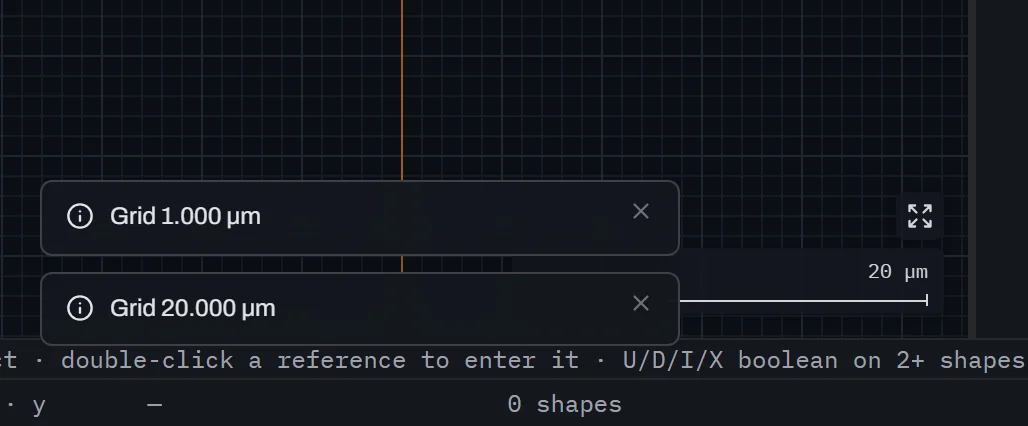 View full image
Start the remap. Last, open once more and scroll to Component library — it lives in the View group, the next row below Maximise canvas, and ships with no default key. Click Edit. The row doesn't bind anything yet: it switches into a listening state, the value column replaced by an empty text box with a Press a key… placeholder (ringed in the accent color to show it's waiting), and the Edit button replaced by Set. The row keeps its Component library label beside the capture box, so you can always see which action is about to be rebound. Nothing has happened until you actually press a key.
 View full image
Make it yours. Press Ctrl+Shift+L. The dialog validates the combination against every other binding before it commits — a browser-reserved key or one already in use is rejected with a reason shown inline, rather than silently doing nothing — and the row settles back to its normal state with the new shortcut in place.
 View full image
What you built
Nothing on the canvas — this walkthrough is entirely about finding and binding commands faster. You searched the palette and saw why an unrelated command can ride along with a fuzzy match, ran a command and watched the toolbar confirm it instantly rather than four steps later, read the full keymap from the cheat sheet and learned it's not the same surface as the shortcuts dialog despite sharing a title, switched to a KLayout-compatible preset (and learned why this guide remaps only after that switch, plus how to reset everything), applied two different grid presets and watched a toast and the scale bar both prove the switch, and walked a remap through its listening state to a bound key on a command that ships with none. Every one of those is a preference stored in your browser — none of it touches the document, so it carries across every file you open next.
Next steps
The complete, always-current keymap — including whatever preset or remap you leave in place — is the Keyboard shortcuts reference. Tools and shortcuts covers the single-letter drawing tools the palette and cheat sheet both list, and Settings covers the rest of what lives in that same dialog — display units, default path width, hierarchy depth and arc tessellation. Then open the editor and make it yours.