Boolean and layer operations
Two overlapping shapes on a mask usually need to become one thing — or the difference between them, or only what they share. Glyph gives you two separate tools for that, and it matters which one you reach for. Selection booleans consume the shapes you pick and leave one result in their place; layer operations read two whole layers and write the result to a third, leaving the sources untouched. This guide walks through both, plus the two things that live in the same dialog and panel as layer operations: grow/shrink sizing, and the dark-field mask-tone preview. (A third combining path exists too — a Draw mode picker in the Properties panel that merges or subtracts live, at the moment you commit a new box/polygon/path/circle/arc; see Drawing modifiers for it, since it changes how you draw rather than what you select afterward.)
- Time: ~13 min
- You'll need: Glyph open on a blank document. Nothing to download, no file to load.
One orientation note before you start: the tabbed panel with Layers / Cells / Objects / Results sits on the right-hand side of the window, underneath Properties — this guide uses it constantly. A blank document starts with three layers already defined (Layer 1, Layer 2, Layer 3); this guide uses Layer 3 for the selection-boolean demo and Layers 1/2 for the layer-operations demo, so the two exercises never share geometry. No drag lands on an exact micrometre by hand, so every box below follows the same pattern: drag roughly with the Box tool, then read and correct its exact X, Y, W, H in the Properties panel (which is authoritative), pressing Enter after each. W and H resize the shape about the point the Anchor chips (Corner / Center, at the top of the Properties panel) light, so that point stays put: on Corner the lower-left corner holds, on Center the centre does. Either way, the order you type W, H, X and Y in doesn't matter.
Draw two overlapping boxes. Click the
Layer 3row in the Layers panel to make it the active drawing layer, then pick the Box tool and drag out a rough box near the origin. Glyph's draw tools are one-shot and drop back to Select after each shape, so the box stays selected — typeW 20,H 20, thenX -15,Y -15(µm) into Properties to land it exactly at −15 to 5 µm on both axes. Pick Box again — re-arming is required every time — and drag a second rough box a little up and to the right, then size it toW 20,H 20,X -5,Y -5, overlapping the first by 10×10 µm. The status bar reads2 shapes · 1 selected.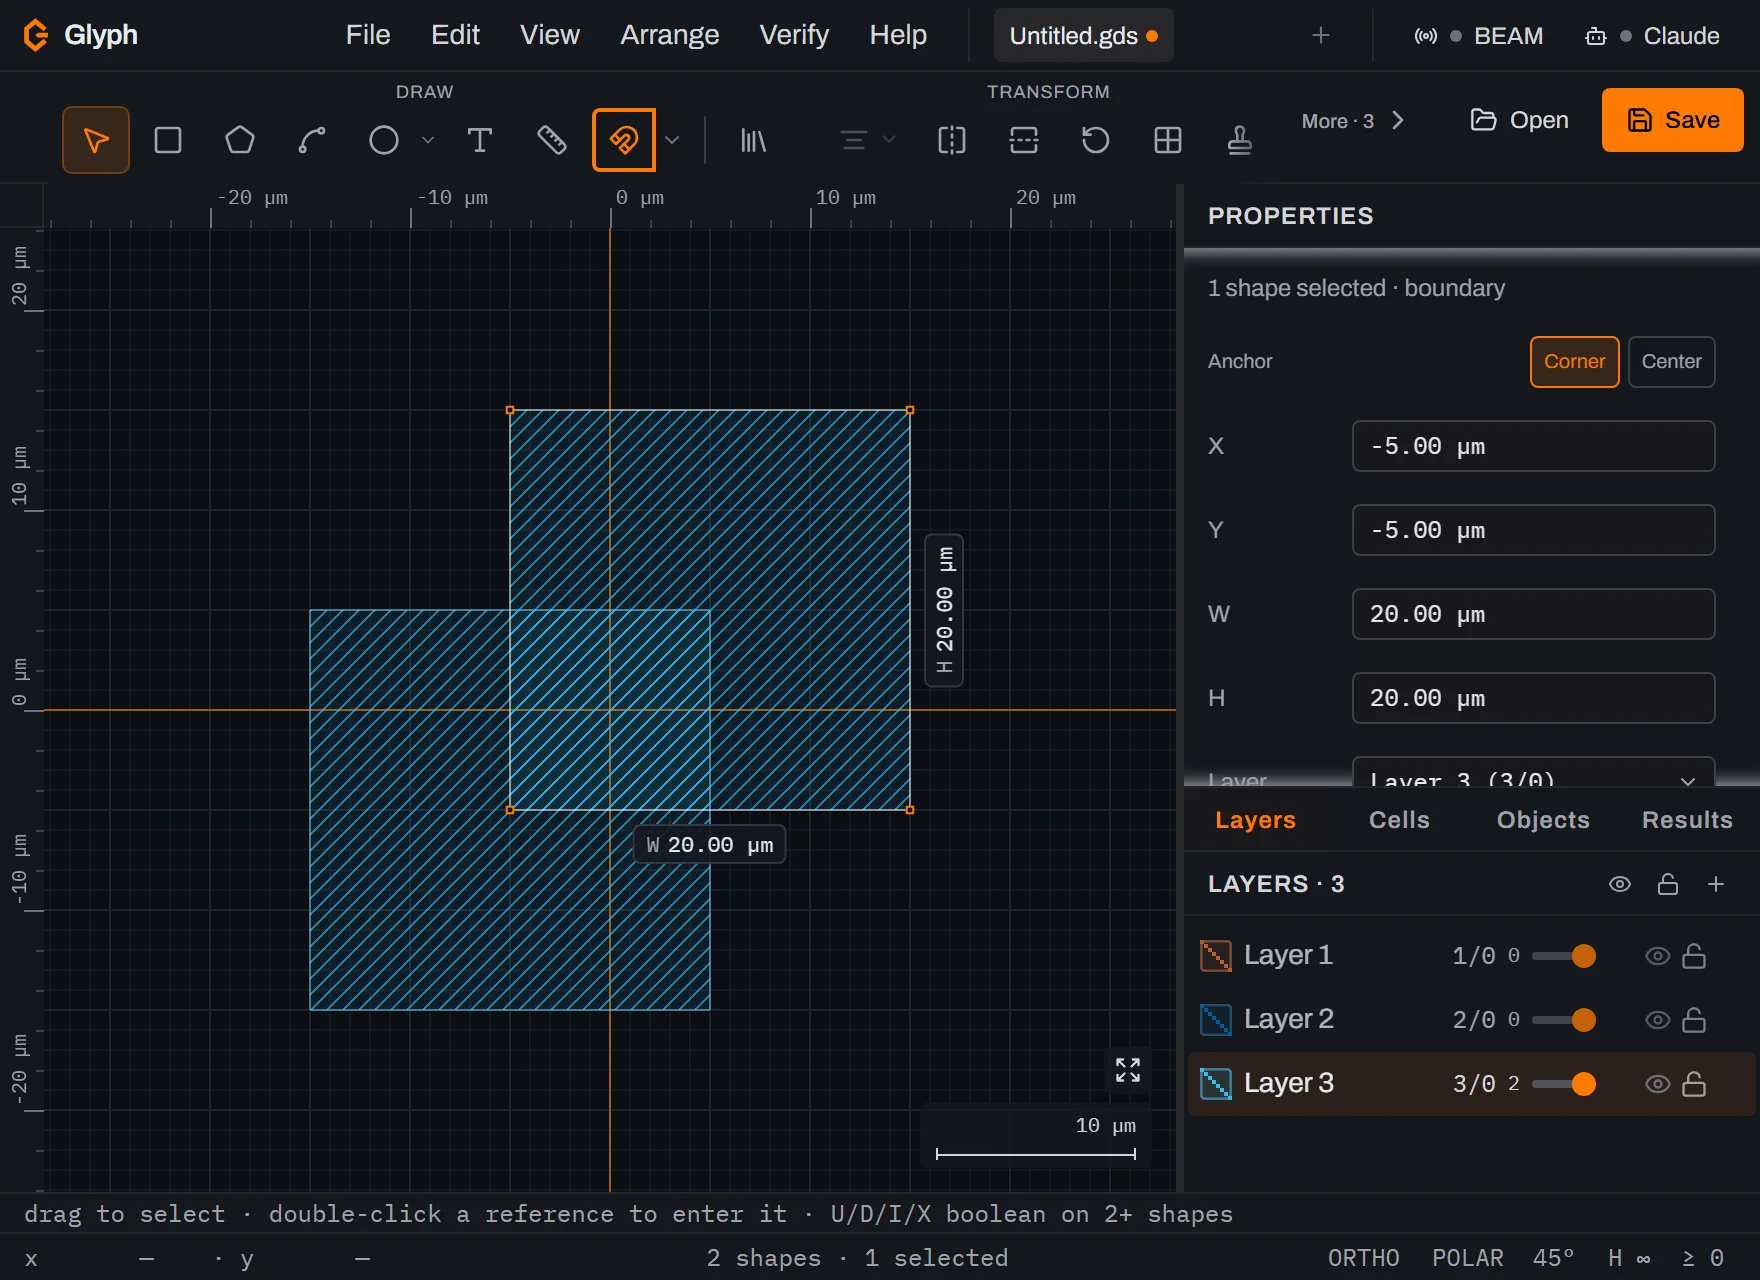 View full image
Select both boxes. Click the Select tool and drag a marquee that encloses both boxes, starting from empty canvas. Once you release the drag, the marquee rectangle itself disappears and both boxes show pale selection outlines instead — there are no handles on the pair. The reliable confirmations are the Properties panel reporting their combined 30×30 µm bounding box and the status bar reading
2 selected.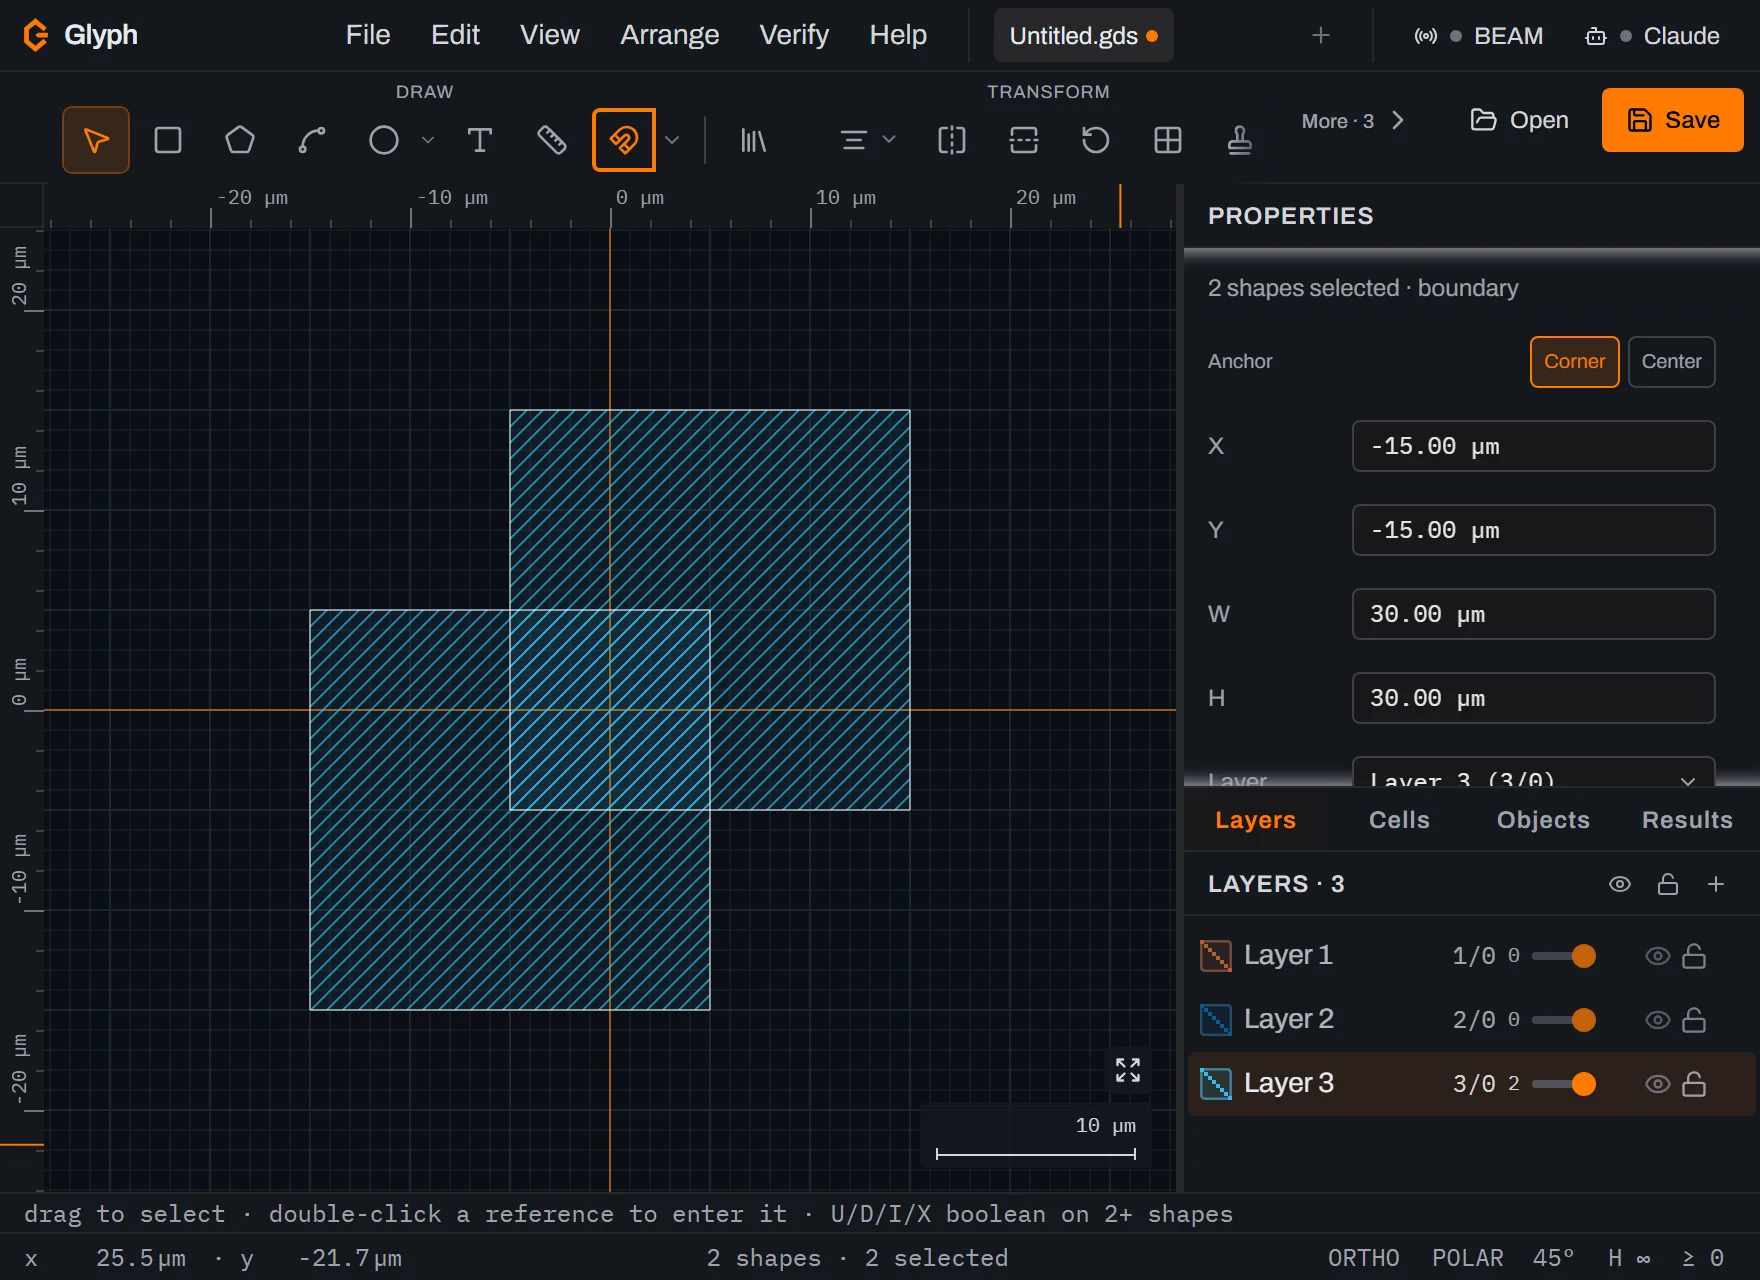 View full image
Read the boolean shortcut off the hint strip. At the bottom of the window, a hint line always shows what the current tool can do next. With the Select tool active it ends
U/D/I/X boolean on 2+ shapes— four single-key shortcuts for Union (OR), Difference (SUB), Intersect (AND) and XOR — the names every menu and dialog now uses — live the moment two or more shapes are selected. View full image
Press U. The two overlapping boxes merge into a single L-shaped boundary — a real union, not two shapes drawn on top of each other. The status bar reads
1 shape. Selection booleans consume their inputs: the two source boxes are gone, replaced by the one result.IandXdon't care which shape you selected first or second — keep-the-overlap and keep-the-non-overlap are symmetric either way.Dis the one that does care about order, but not the order you clicked in: it subtracts every other selected shape from whichever was drawn first (earliest in the cell), which is not necessarily whichever you happened to click first or last in a marquee.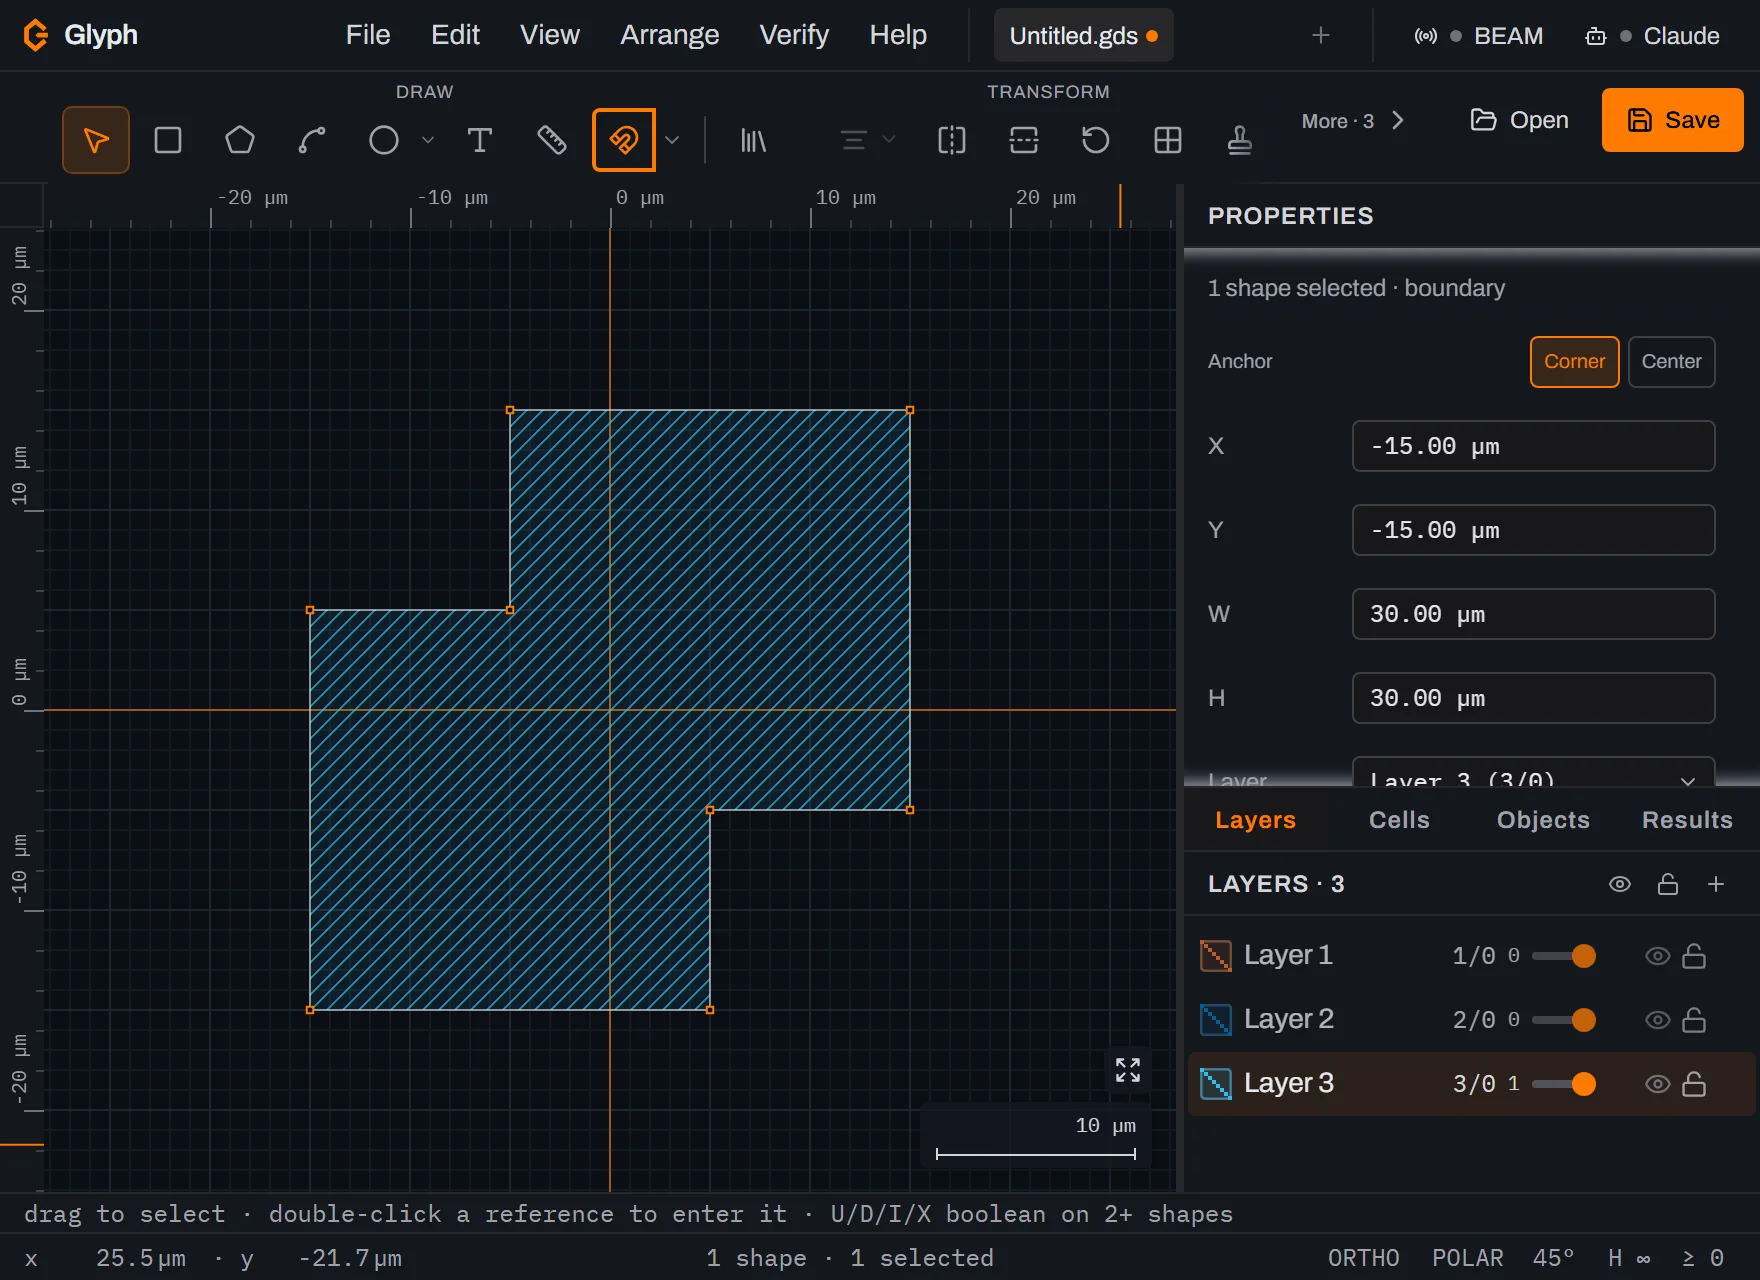 View full image
Press Ctrl+Z. The union is a normal command on the undo stack, so undo restores exactly the two original boxes — same positions, same layer, same shapes — and their selection along with them. The status bar reads
2 shapes · 2 selectedagain.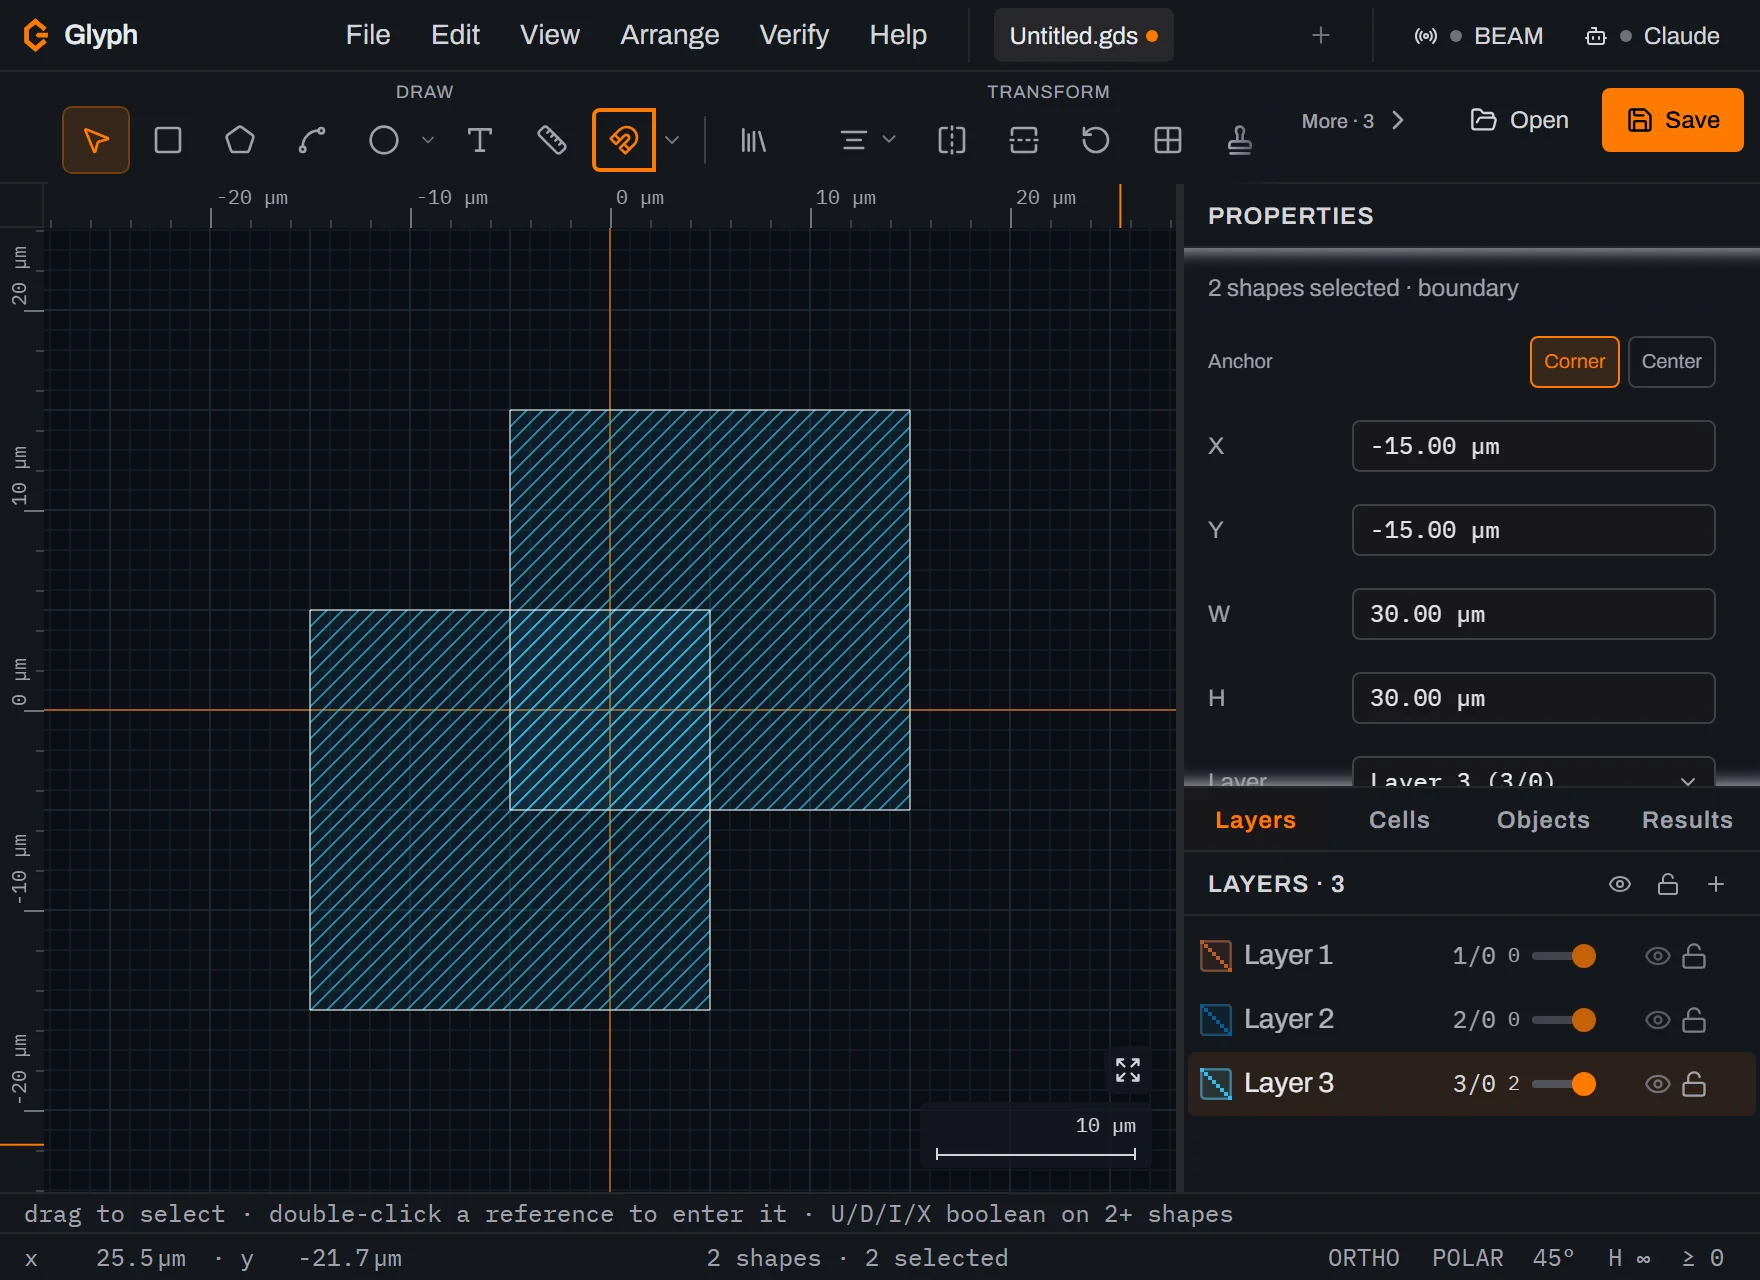 View full image
Set up a whole-layer operation. Click the
Layer 1row to make it active, pick Box and drag a rough box, then size it toX 50,Y -10,W 20,H 20(µm) — and pressCtrl+0() after sizing it, since those coordinates sit outside the view you drew steps 1–5 in. ClickLayer 2's row, pick Box again — the tool re-arms every time, same as step 1 — drag a second rough box, and size it toX 62,Y -6,W 20,H 20, overlapping the first by 8×16 µm. Open . This dialog works on entire layers, not a selection: leave Operation onUnion (A OR B), Layer A on1/0 — Layer 1and Layer B on2/0 — Layer 2. New layer number defaults to one past the highest layer number the instant the dialog opens — the same number the Layers panel's + would pick; right now that's4, since1,2and3are taken — and it recomputes that default every time you reopen the dialog, so it never remembers a value you typed earlier. Leave it on4, so the result lands on a fresh layer numbered4/0.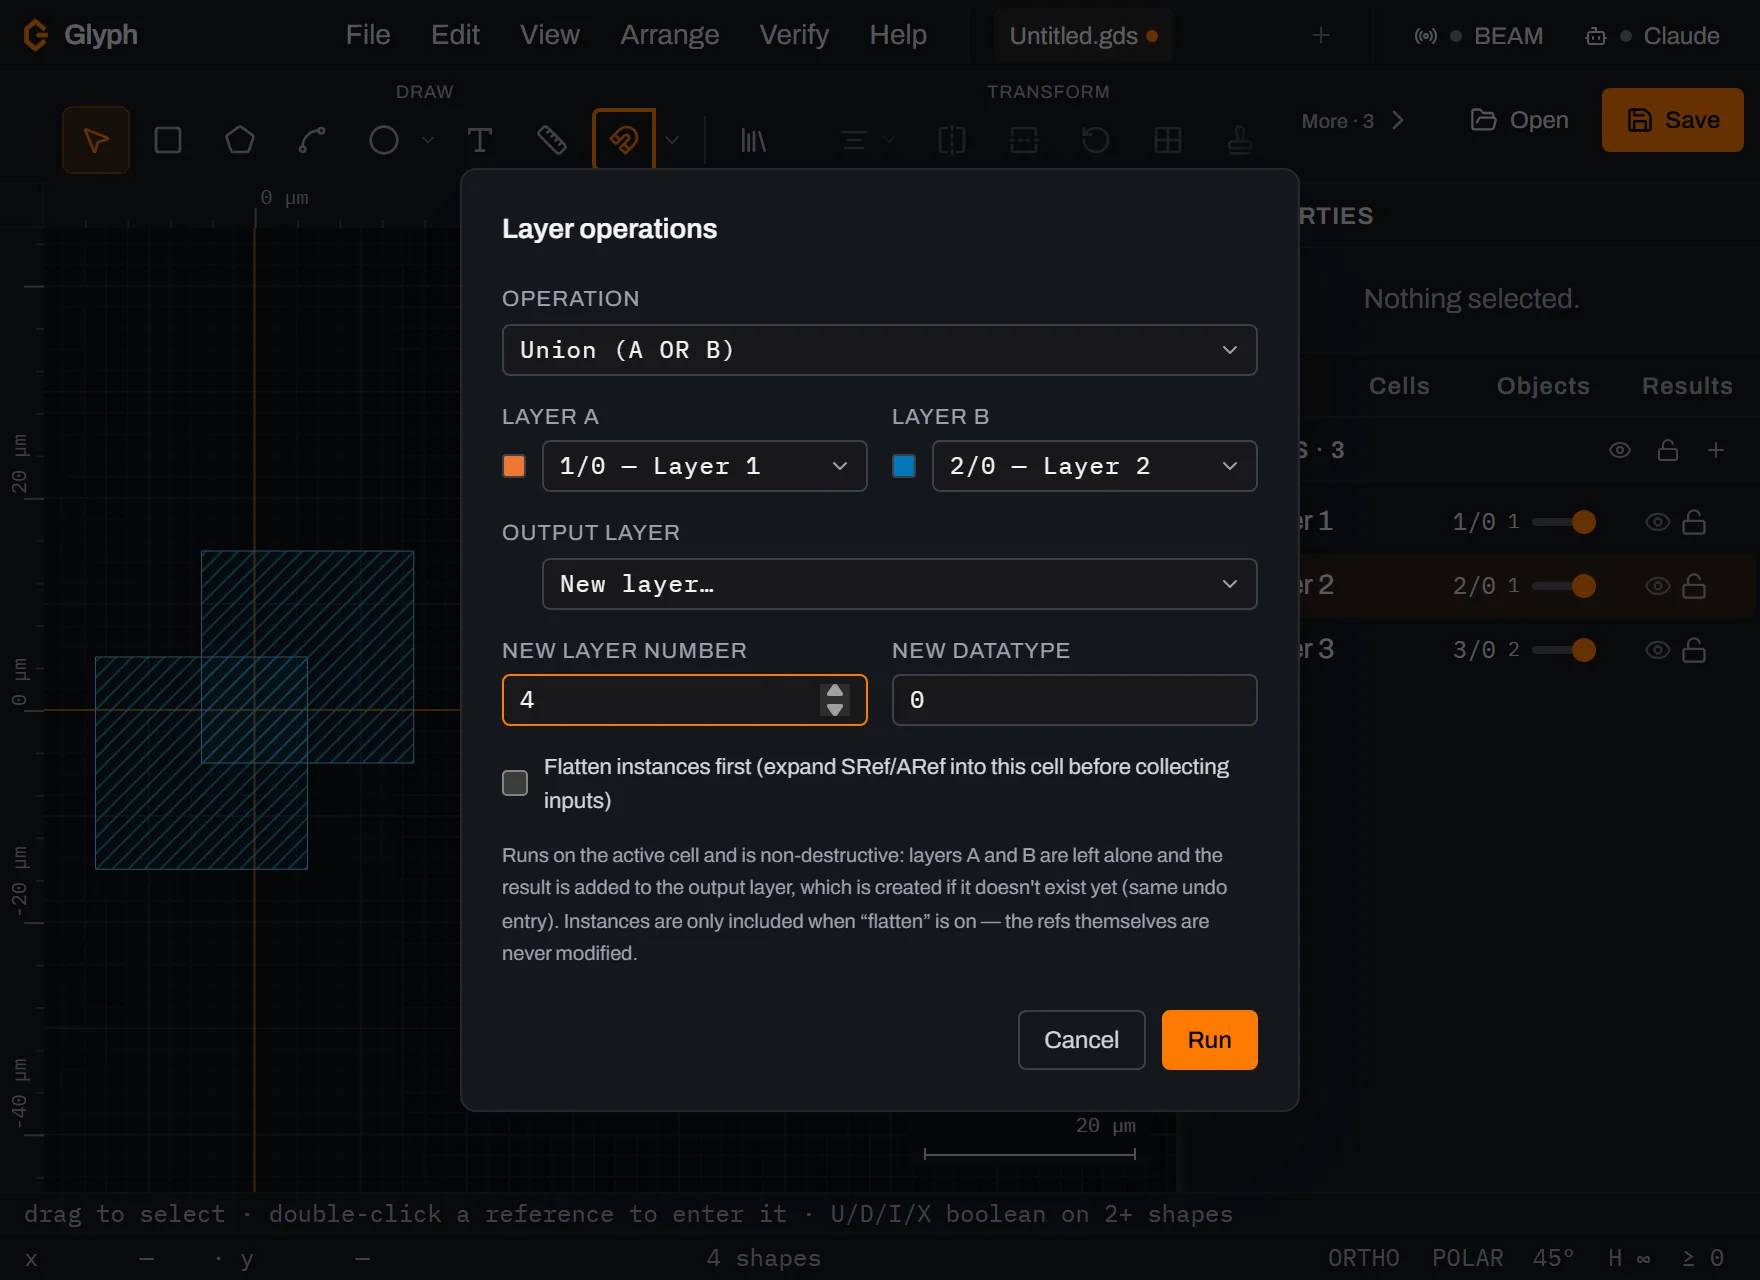 View full image
Click Run. A toast confirms
1 shape added to 4/0 (new layer)., and a new row namedLayer 4appears in the Layers panel holding 1 shape (Glyph names an auto-created layerLayerplus its number, as the Layers panel's + does). Layer operations are non-destructive:Layer 1andLayer 2still read1each — their boxes were only read, never removed. This is the exact opposite of step 4's selection union, and it's why the two tools coexist rather than one replacing the other.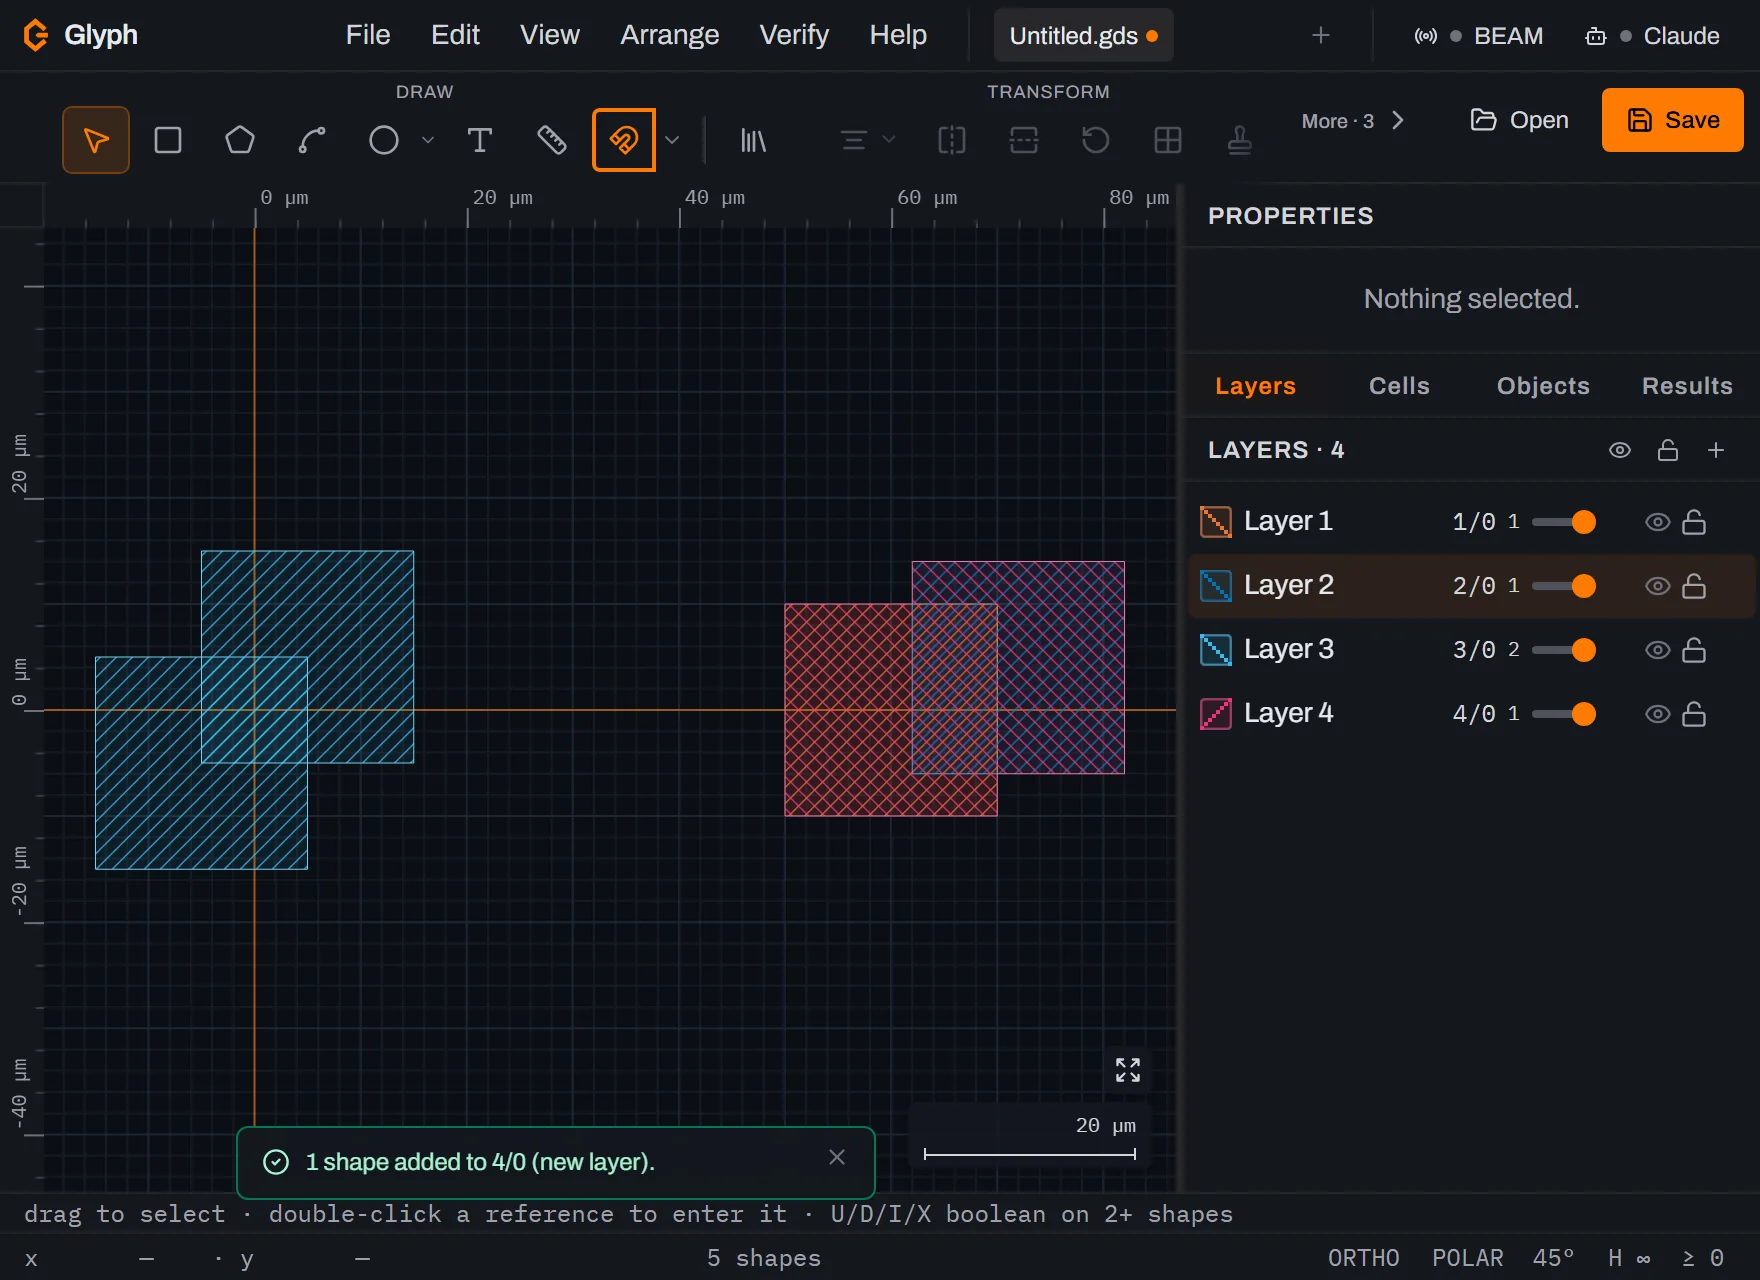 View full image
Reopen the dialog and switch to Grow. Open again and change Operation to
Grow A by distance. Grow and shrink are unary — Layer B disappears from the form entirely and a Distance field takes its place, because sizing only ever reads one layer. New layer number has already recomputed itself to5— the same recompute-on-open behaviour as step 6: one past the highest layer number, now that4exists. Leave it there and type2into Distance (µm) for a 2 µm grow. Sizing is true morphological offsetting with round corners, the same construction the design-rule checker uses; it's capped by input vertices rather than shape count because it costs roughly eight times a plain boolean on the same shapes.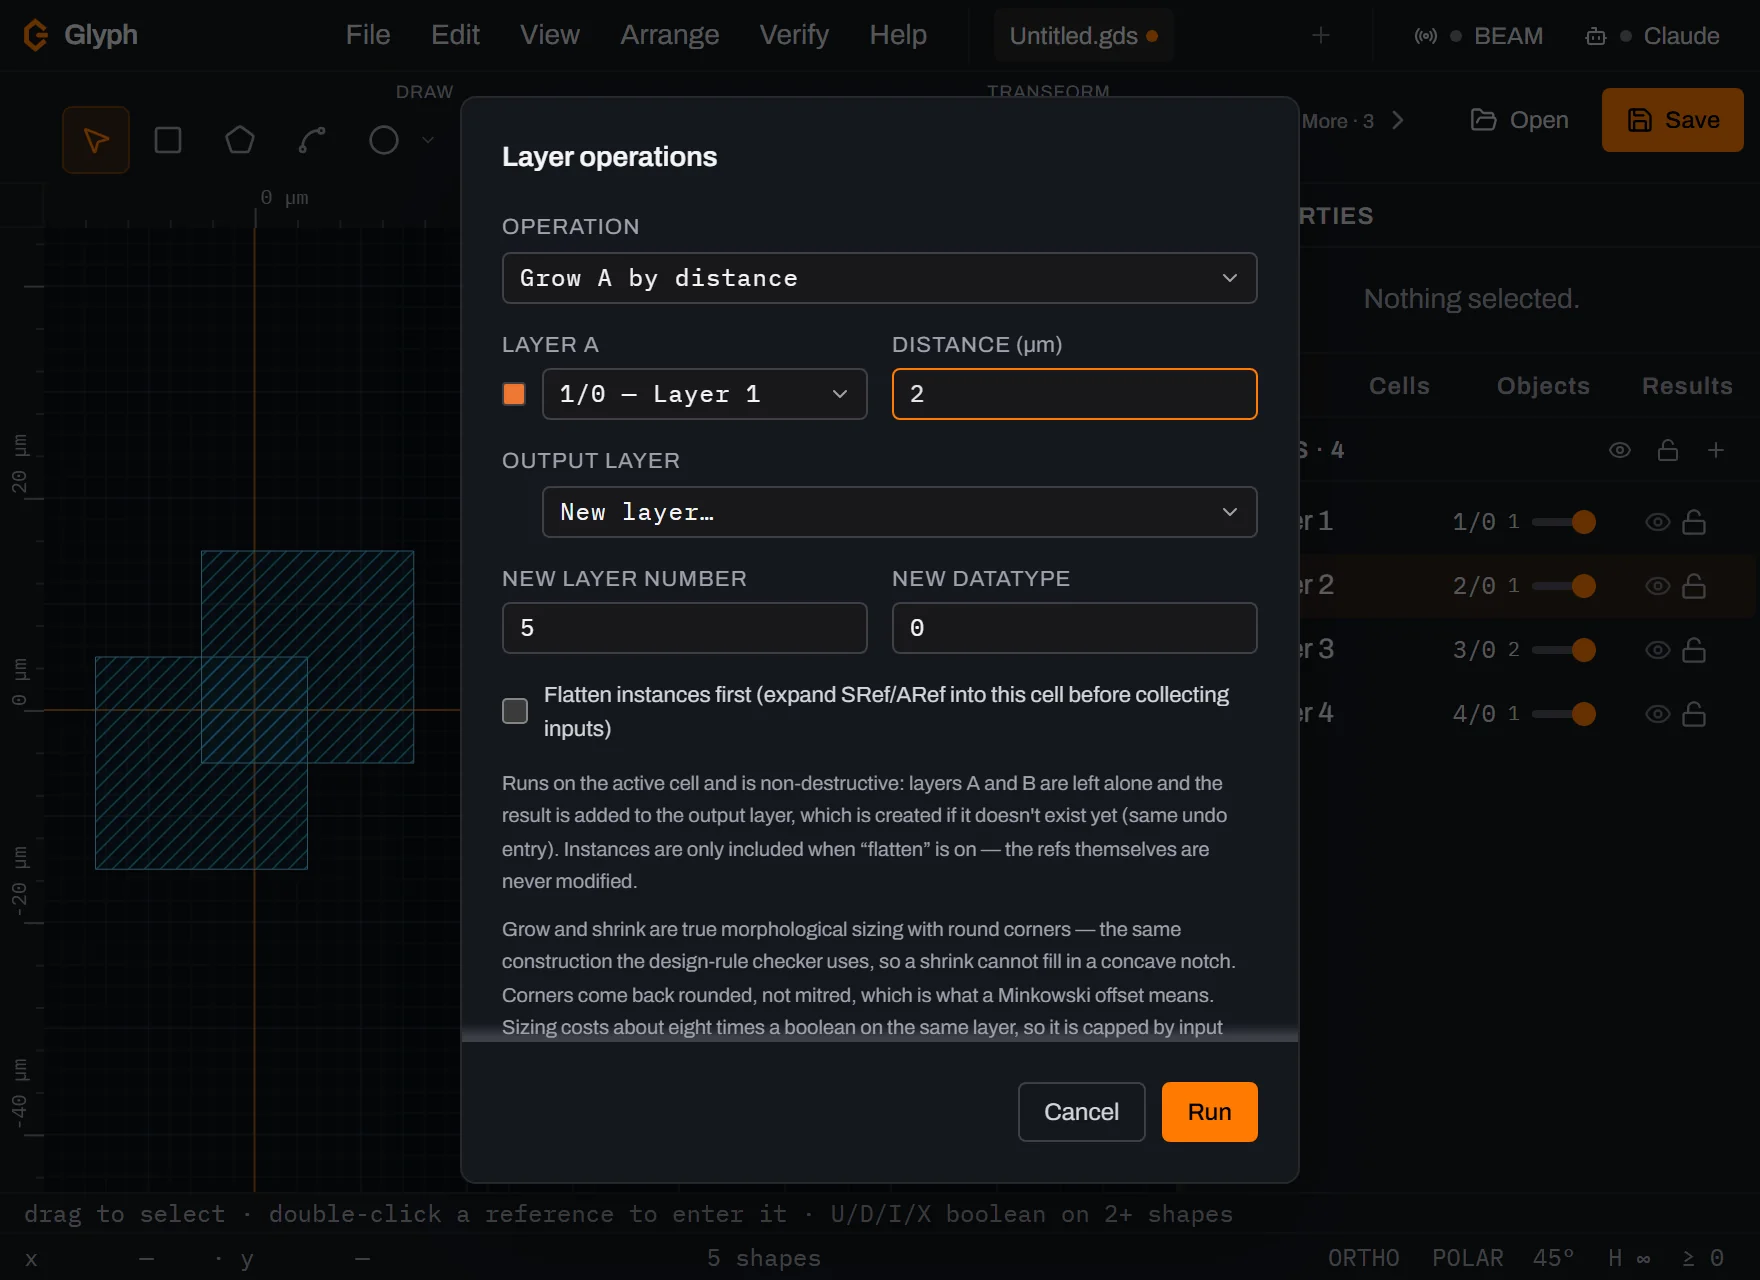 View full image
Click Run. A toast confirms
1 shape added to 5/0 (new layer)., and a new row namedLayer 5appears in the Layers panel — a rounded copy of Layer 1's box, 2 µm bigger on every side, the rounded corners a Minkowski offset always produces.Layer 1itself still reads1: grow is exactly as non-destructive as the union above.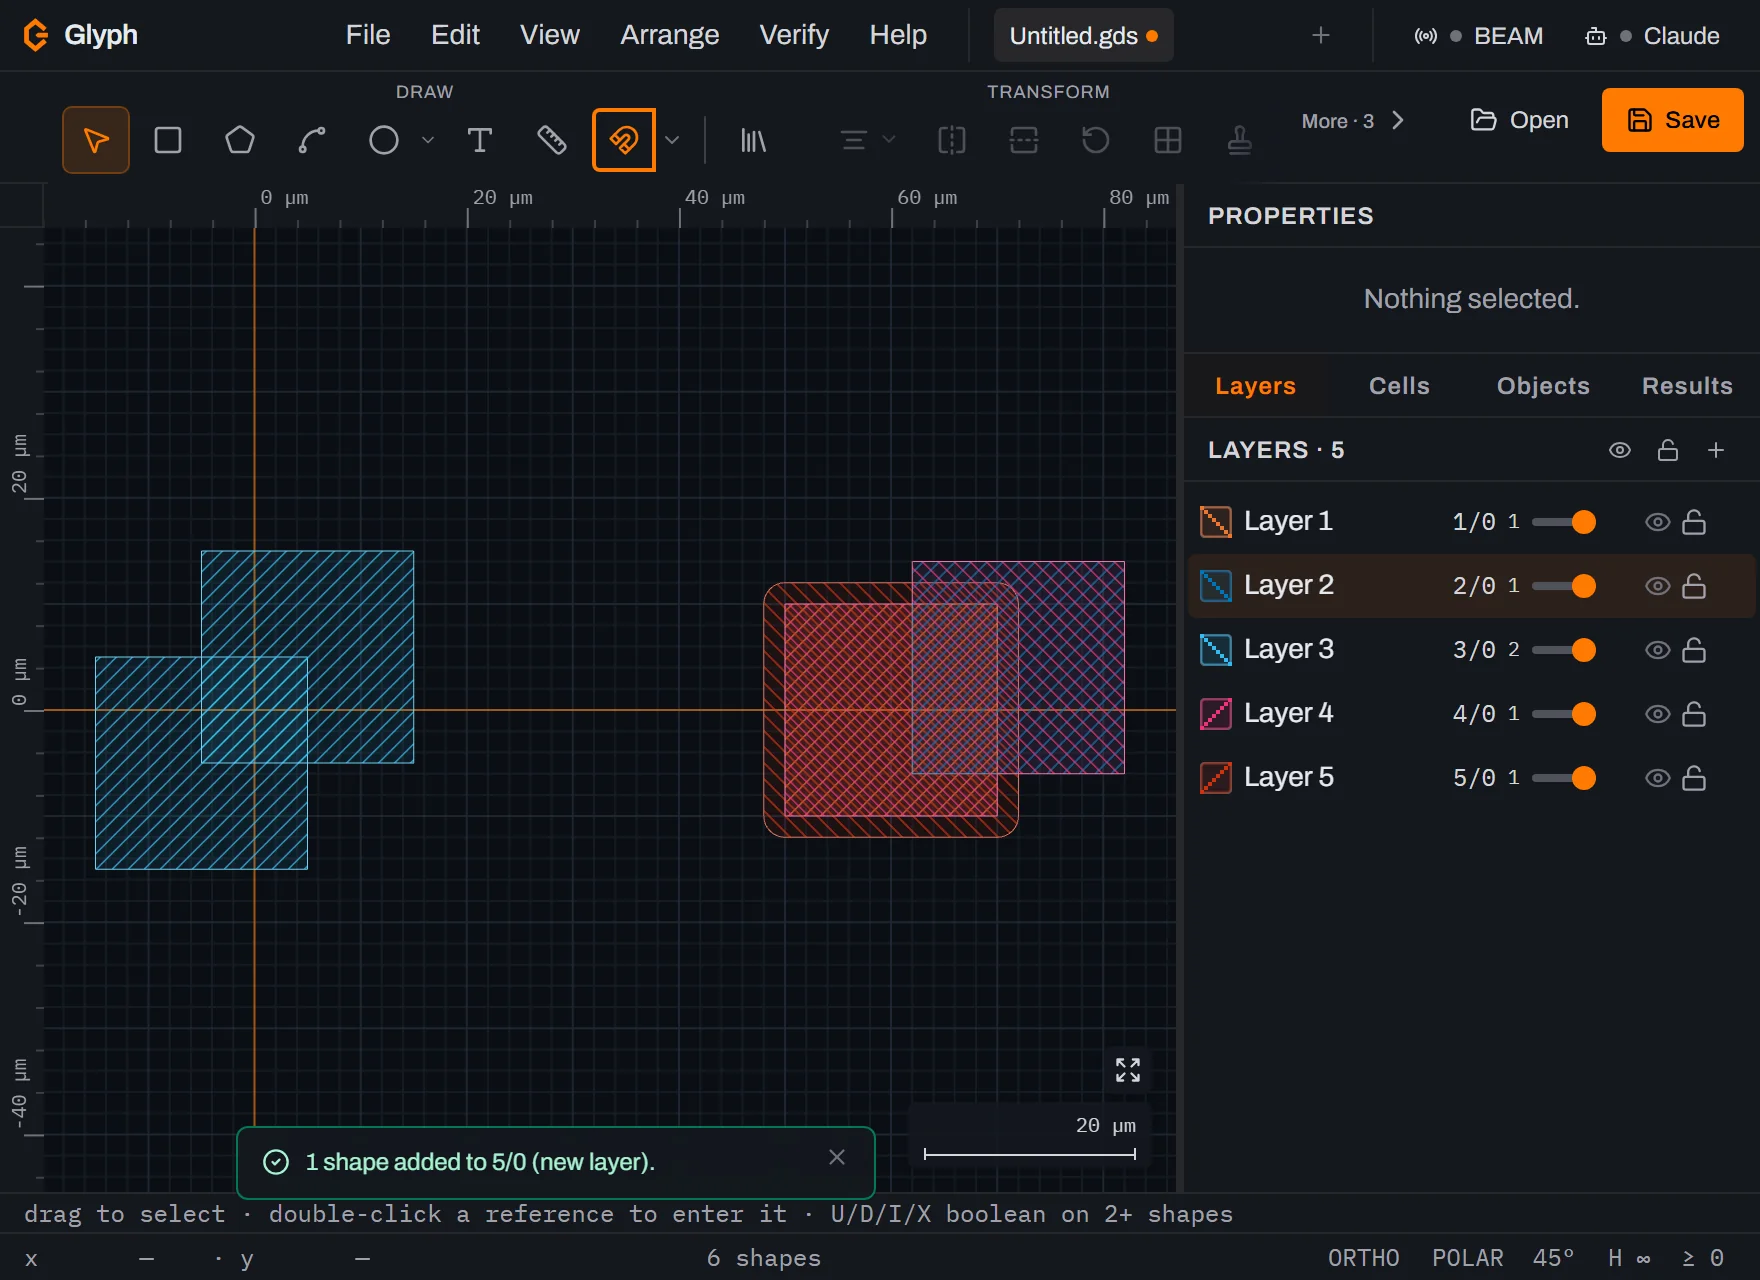 View full image
Set Layer 1's mask field tone. Click
Layer 1's colour swatch — the small ~14 px hatched square at the left edge of its row — to open Layer colours & field tone, then clickDark fieldunder Mask field tone.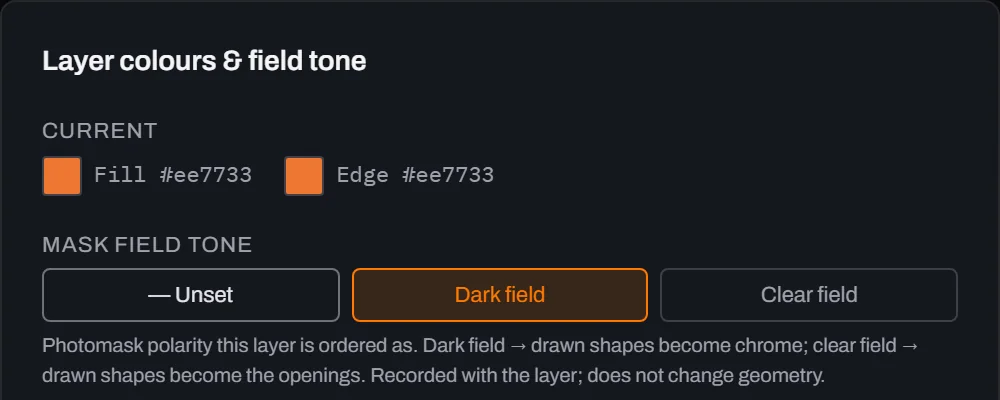 View full image
Close the dialog and find the new row icons. Click
Close, then click theLayer 1row to make it the active layer again —Layer 2has been active since step 6. The row now shows two things it didn't before: aDFbadge (dark field) right after the layer name, and — immediately after thatDFbadge, before the1/0layer number — a small contrast icon, distinct from the opacity slider, the select-shapes-on-layer icon, the visibility eye and the lock further along the row. That contrast icon is the field-preview toggle you'll click next. At the panel's default width the name column has no room left once theDFbadge and contrast icon are both present, soLayer 1itself truncates hard toL.— hover the row (or widen the panel) to read the full name; the row'stitleattribute still carries it.
Preview Layer 1 as it will actually expose. Click the contrast icon. Every other layer hides and the canvas repaints as a punch-out: the mask blank fills in
Layer 1's colour (the chrome), with the drawn box cut out of it in the background colour (the opening). A bar across the top of the Layers panel names the layer and its tone (DARK FIELD · INVERTED), and offersBlankwidth × height fields (they show the auto-fit size —24×24here — which you can overwrite with your own) plus amarginpercentage that pads that auto-fit, so you can preview against a specific mask blank instead of just the layer's own bounding box. This is preview-only — geometry and exports are unchanged, and it's exclusive, so only one layer previews at a time. ClickEXIT, top right of that bar, to leave the preview and bring every other layer back.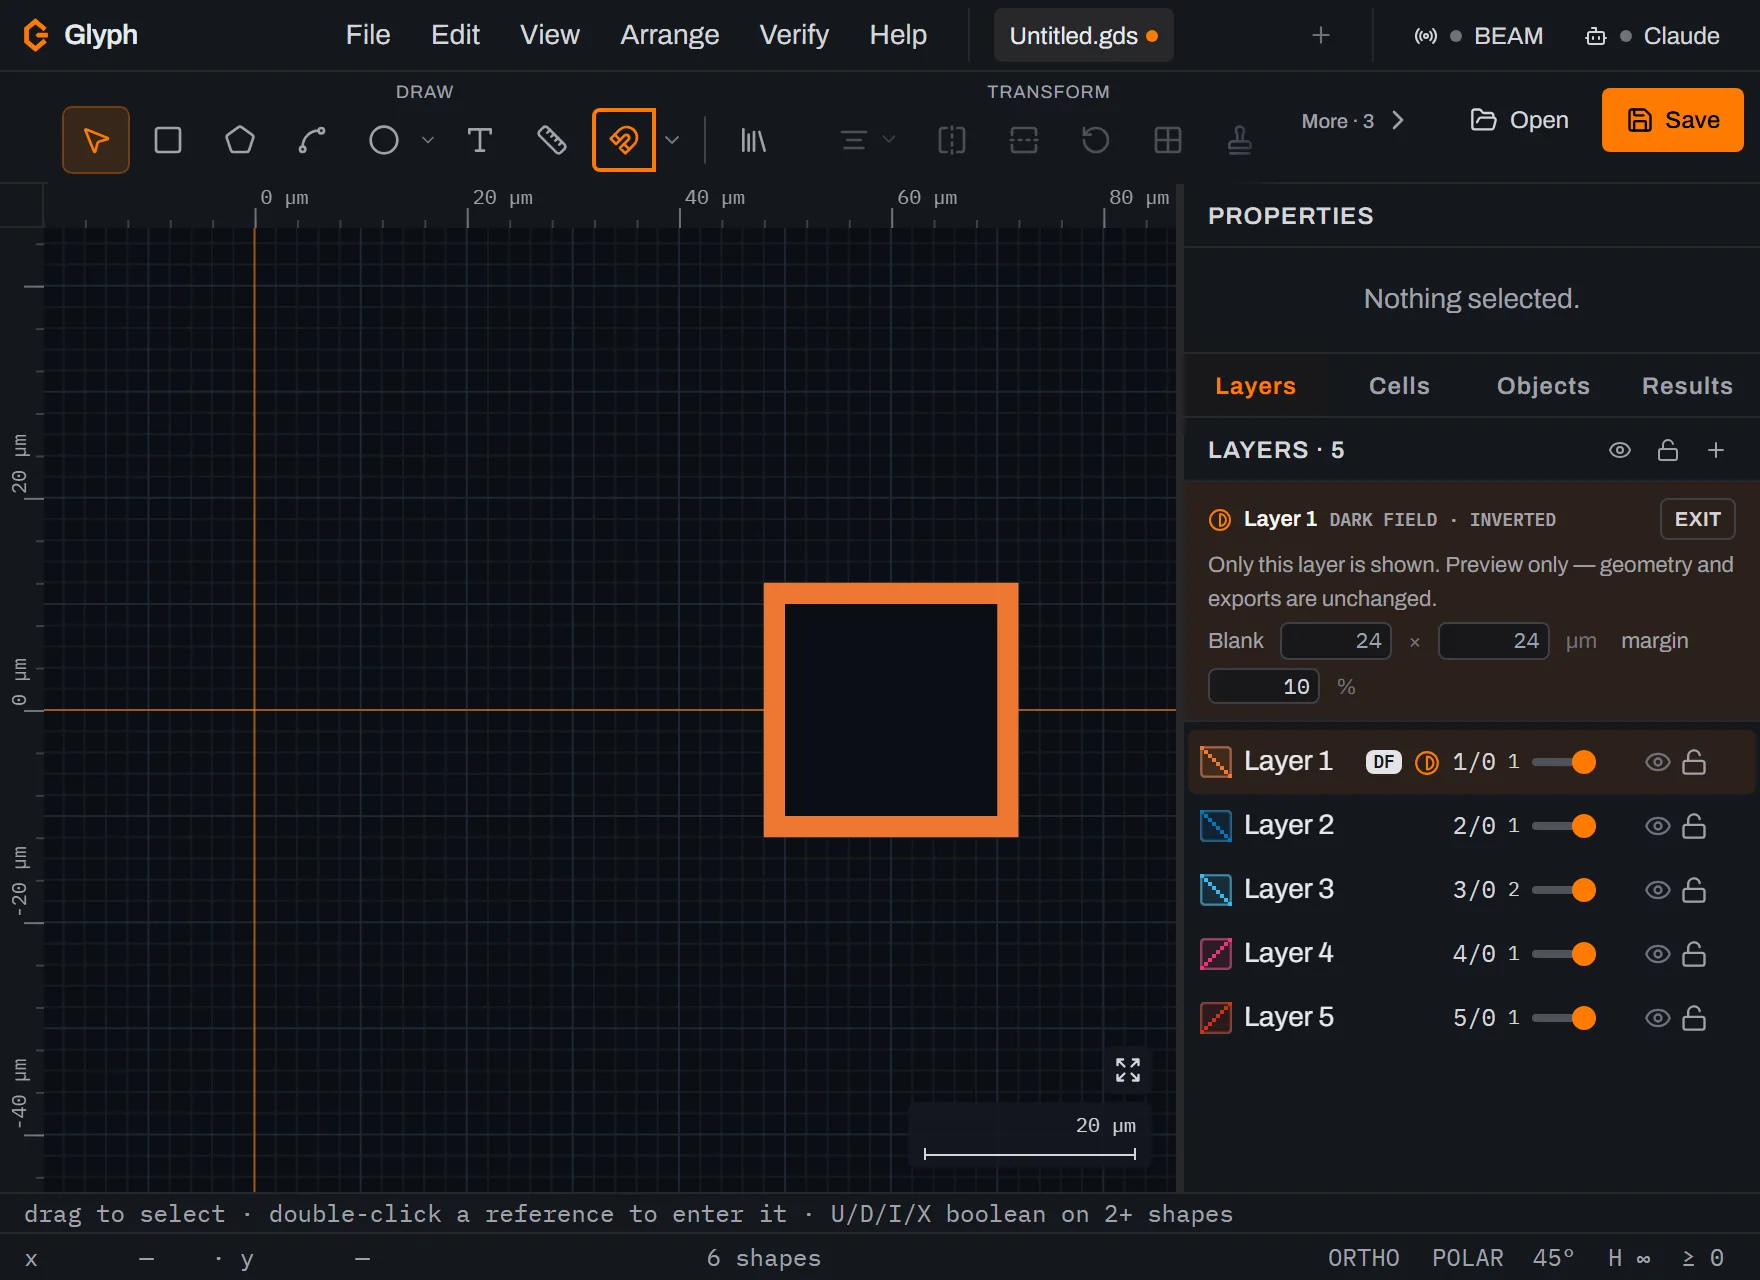 View full image
What you built
Six shapes across five layers, and three of Glyph's four ways to combine geometry: a selection union you could undo back to its two sources on Layer 3, a non-destructive whole-layer union that left Layer 1 and Layer 2 readable while writing its result to Layer 4, a grow operation that read Layer 1 and wrote a rounded, 2 µm-larger copy to Layer 5, and a live dark-field preview of what Layer 1 will look like as exposed chrome. None of the last three touched geometry outside their own output layer — that's the whole point of keeping selection algebra and layer algebra as two separate tools. (The fourth, draw-time merge/subtract, is a session toggle rather than a dialog — worth a look once these two feel familiar.)
Next steps
Read Boolean operations and layer merge for the full U/D/I/X reference and the related "Merge active layer" command, and Layers for everything else a layer row carries — colour, fill pattern, opacity, lock, and mask field tone. The rest of the Arrange menu, including Layer operations' grow/shrink cousins, is in Arrange, and every shortcut used above is listed in Keyboard shortcuts. Then open the editor and try a difference or an XOR on your own layers.